|
|

Rank: Advanced Member
Groups: Member
Joined: 9/7/2005
Posts: 1,154
Location: Copake, NY
|
The past months I have been working on the RC controls and the cab. Initially I had a lot of stuff in the cab. 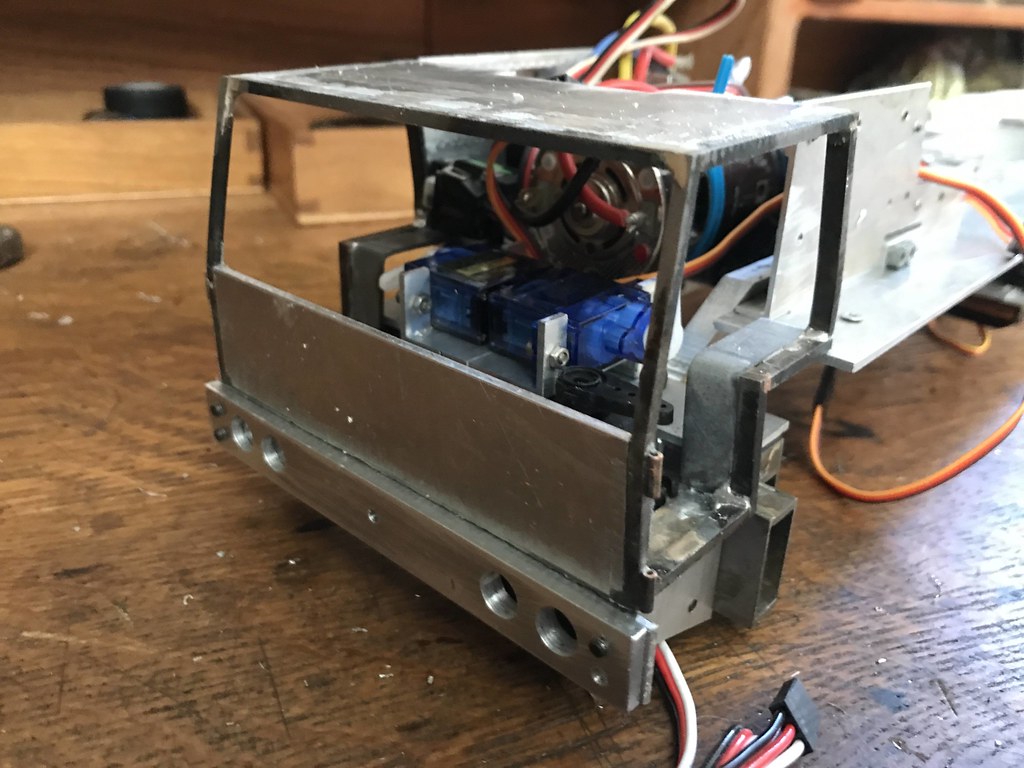 But I changed my mind and opted to create more space for the interior, like chairs, etc. that meant that I had to rearrange things a bit. I also fitted the light, which are usually an afterthought, but actually take quite a bit of space. Luckily there is some space behind the cab and there I fitted one servo (gearbox), the receiver and the speed control. There are two servos between the front axles and the rear axles on either side (one for the rear steering, the other to engage front wheel drive). The other two servos (5 in total) are under the floor of the cab, one for the high-low gearbox and the other for the front steering. All the servos are micro servos. Unfortunately there is not space (yet) for the battery. I will figure something out.  Then finally I could do a proper test run: https://youtu.be/QchCmGFTASgKerst
 http://forums.dhsdiecast.com/default.aspx?g=posts&m=1096251 http://forums.dhsdiecast.com/default.aspx?g=posts&m=1096251
|
|

Rank: Advanced Member
Groups: Member
Joined: 6/5/2007
Posts: 2,774
Location: Sarasota, Florida, USA
|
Wow Kerst!!! That's awesome!!!
Dain
I'm a kid at heart, so I will play with any model construction vehicle from 1:87 scale to 1:1 scale!!!!
Age is a state of time NOT a state of mind!!
|
|
Rank: Advanced Member
Groups: Member
Joined: 9/7/2005
Posts: 1,154
Location: Copake, NY
|
Two pictures of the front and how the RC gear is fitted in 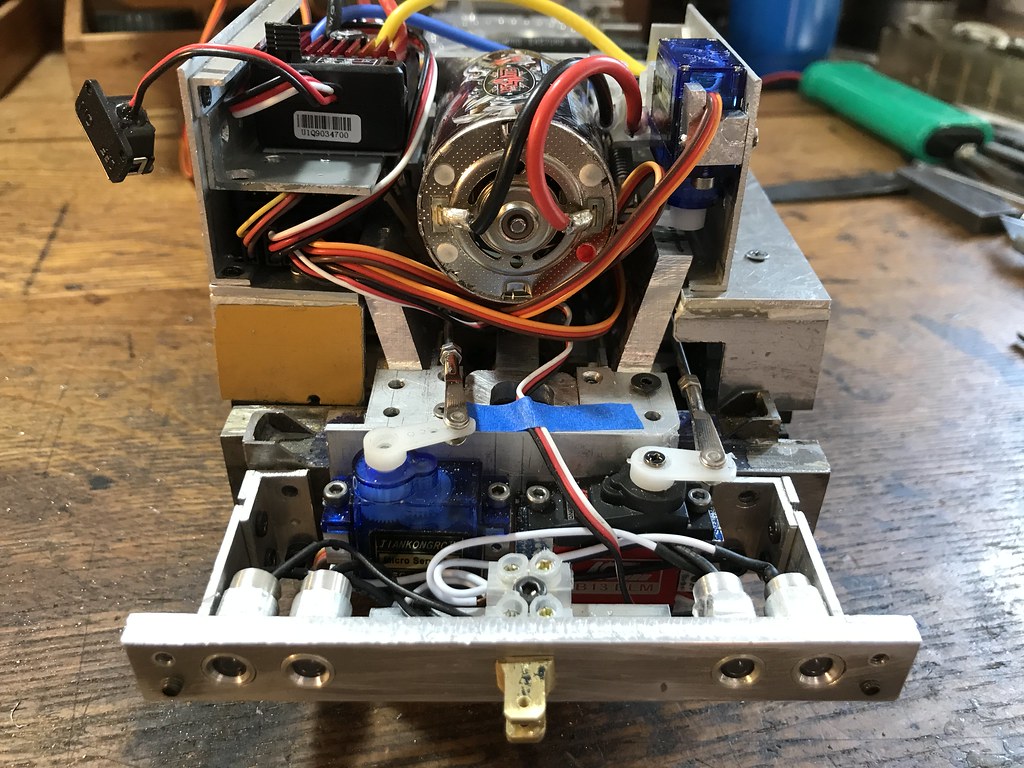 and here with the cab:  Kerst
http://forums.dhsdiecast.com/default.aspx?g=posts&m=1096251
|
|

Rank: Advanced Member
Groups: Member
Joined: 1/11/2007
Posts: 9,070
Location: Lincolnshire
|
That is just incredible. Love the video of the test!
Paul R
|
|
Rank: Advanced Member
Groups: Member
Joined: 9/7/2005
Posts: 1,154
Location: Copake, NY
|
I did a little photo shoot today.  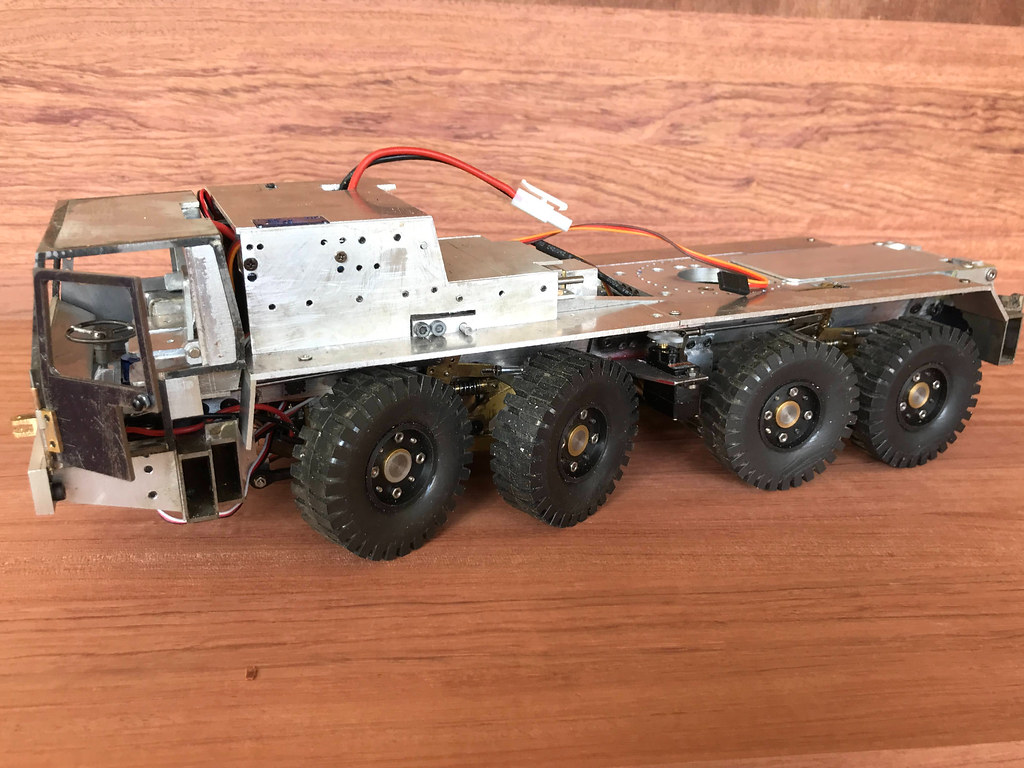 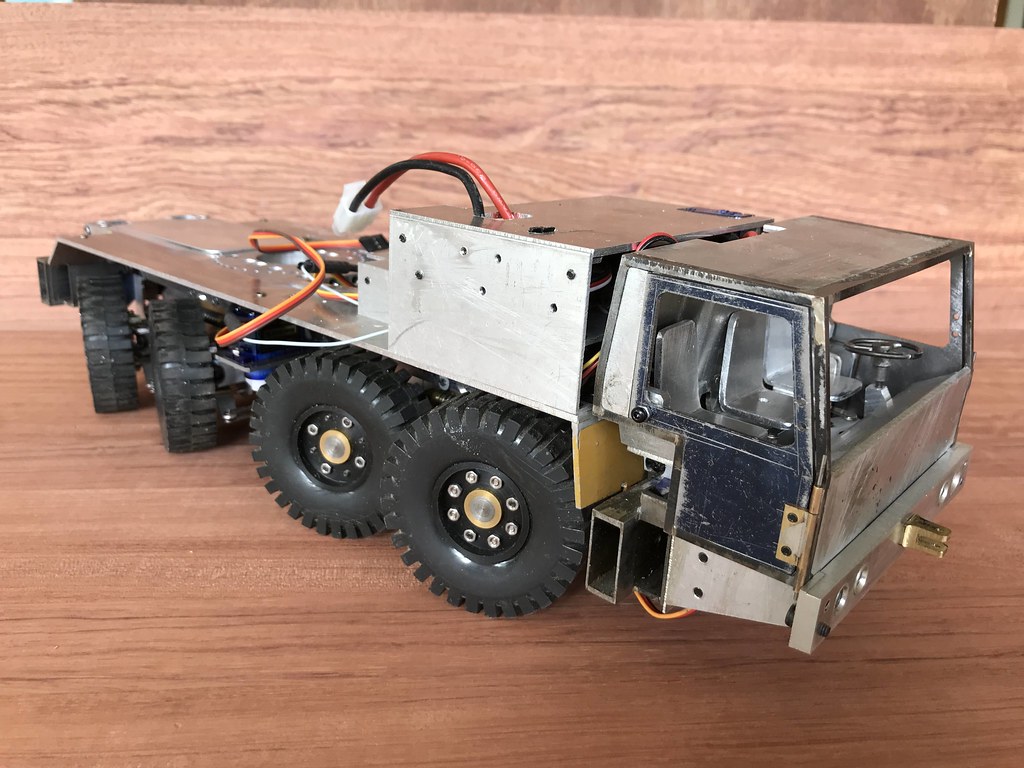   The carrier is getting there. It looks a bit lopsided (leaning forward) , but that is because the suspension is sprung and there is less weight in the back, but that will change. The outriggers are still missing and quite a few details. Kerst
http://forums.dhsdiecast.com/default.aspx?g=posts&m=1096251
|
|
Rank: Advanced Member
Groups: Member
Joined: 9/7/2005
Posts: 1,154
Location: Copake, NY
|
It is summer and I spend more time outside, but I still managed to make some progress. I just finished the outriggers. I made the beams from 24 gauge galvanized steel, soldered together in an elaborate jig. They turned out quite nice.  . The jacks are hand operated. They are too small for any motorized solutions, so just M4 screws.  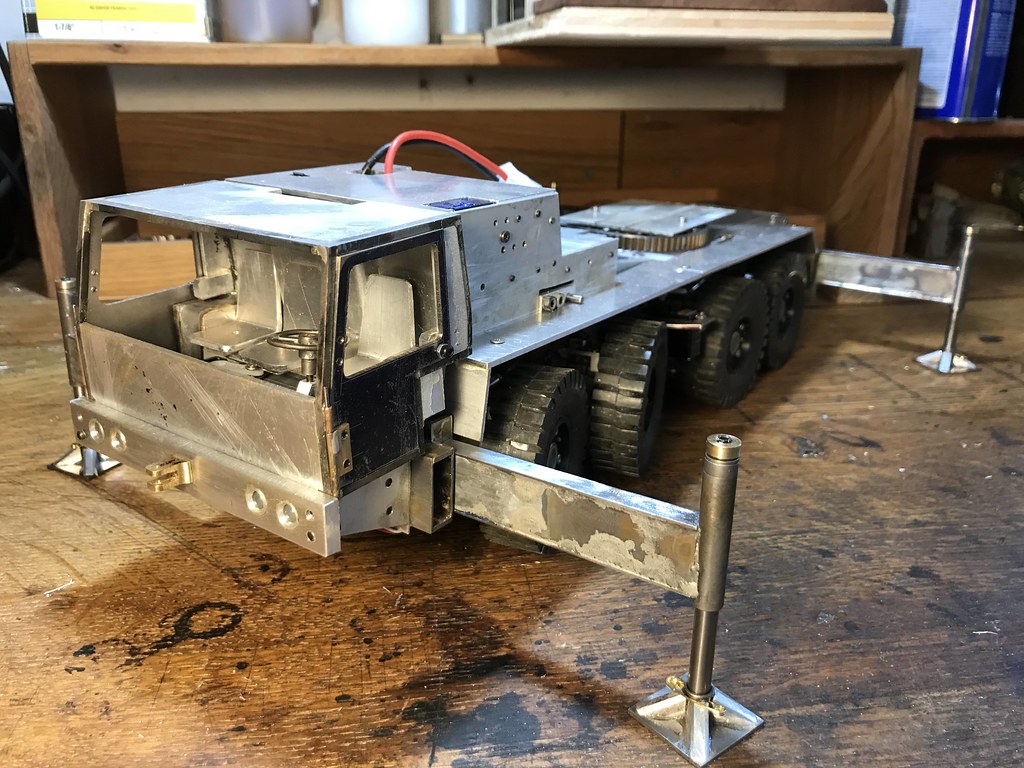 I also made the slewing ring, which is visible in this picture: 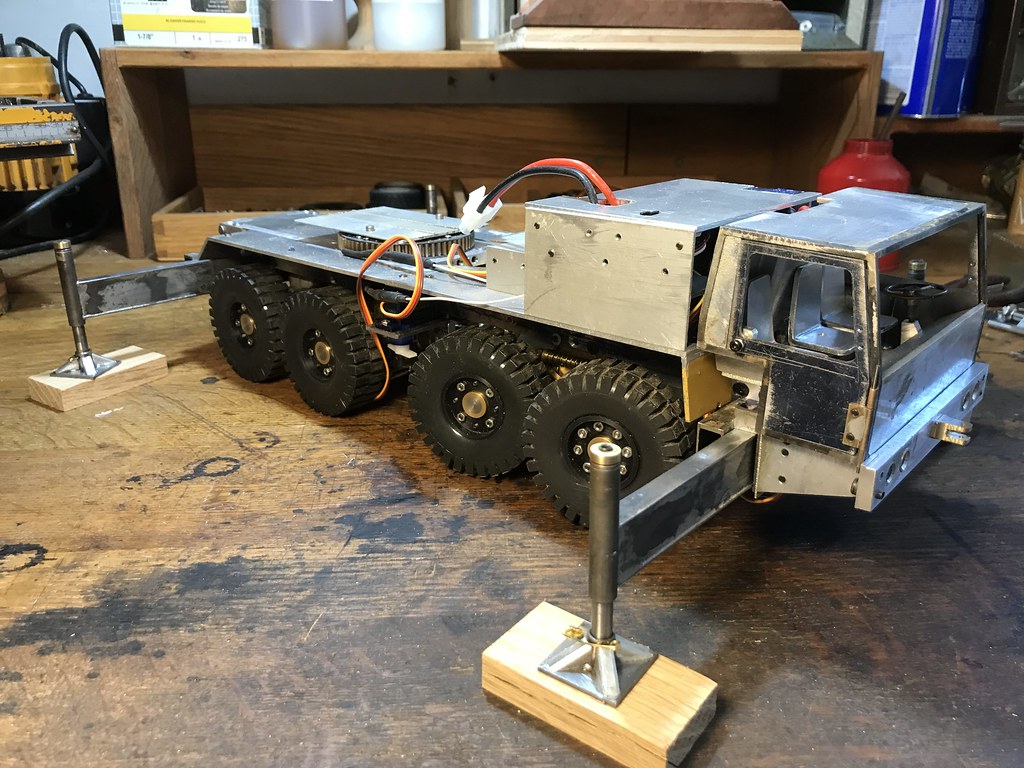 Next is the boom. I will try to make it out of 24 gauge galvanized steel as well. See how that works out! Kerst
http://forums.dhsdiecast.com/default.aspx?g=posts&m=1096251
|
|
Rank: Advanced Member
Groups: Member
Joined: 9/7/2005
Posts: 1,154
Location: Copake, NY
|
|
|
Rank: Advanced Member
Groups: Member
Joined: 1/11/2007
Posts: 9,070
Location: Lincolnshire
|
That is just insane. Great craftmanship!
Paul R
|
|
Rank: Advanced Member
Groups: Member
Joined: 9/7/2005
Posts: 1,154
Location: Copake, NY
|
The boom is ready, except for some cleaning up.  I had some gearbox and axle trouble.  but theses seem to have been resolved, fingers crossed! All functions work now. 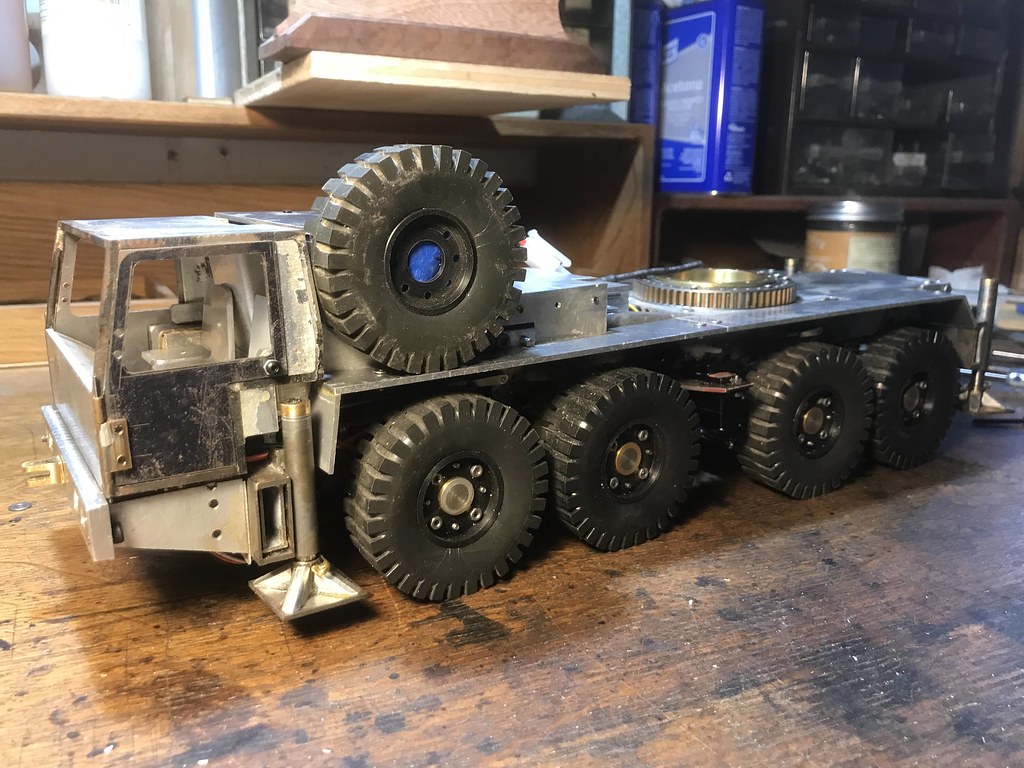 Kerst
http://forums.dhsdiecast.com/default.aspx?g=posts&m=1096251
|
|
Rank: Advanced Member
Groups: Member
Joined: 9/7/2005
Posts: 1,154
Location: Copake, NY
|
During the past two months I have been working on the upper. I made the frame and worked on the boom hoist cylinders, the swing and the winch. The boom cylinders will have spindles and all the components are there, but it all needs to be fitted. I managed to fit the motor right behind the mechanism in the upper. Hopefully the motor will be strong enough. If not I have to redesign everything. 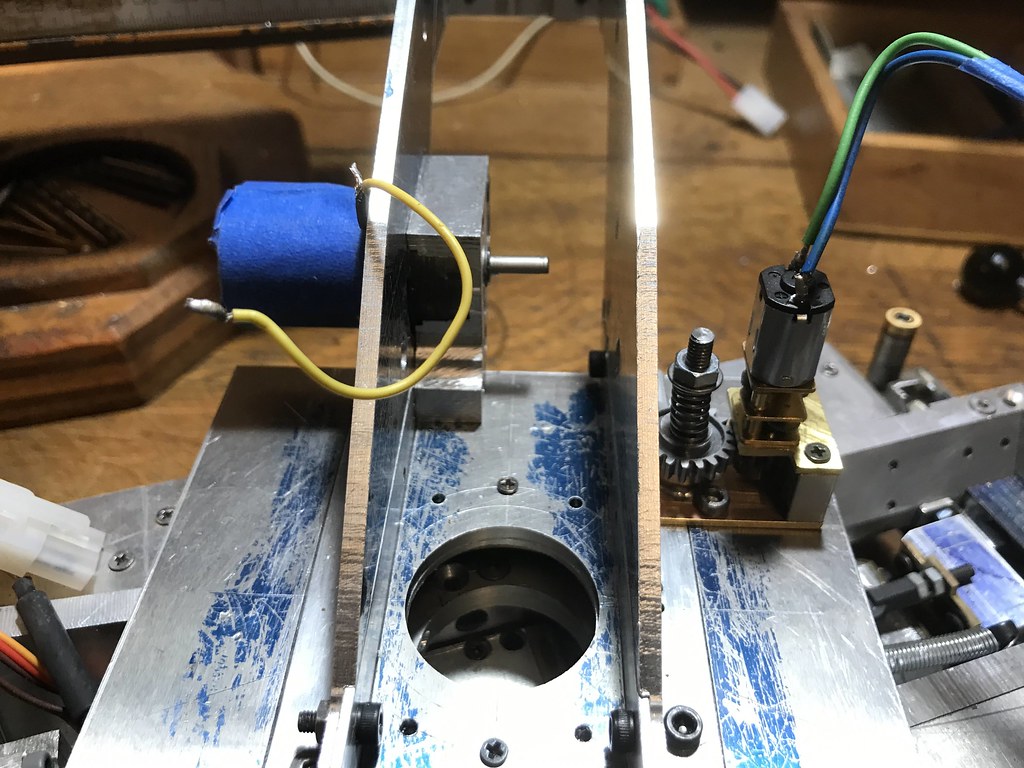 Here are some parts of the spindle and gears for the boom hoist:  The swing motor with an override clutch:  the winch and the motor: 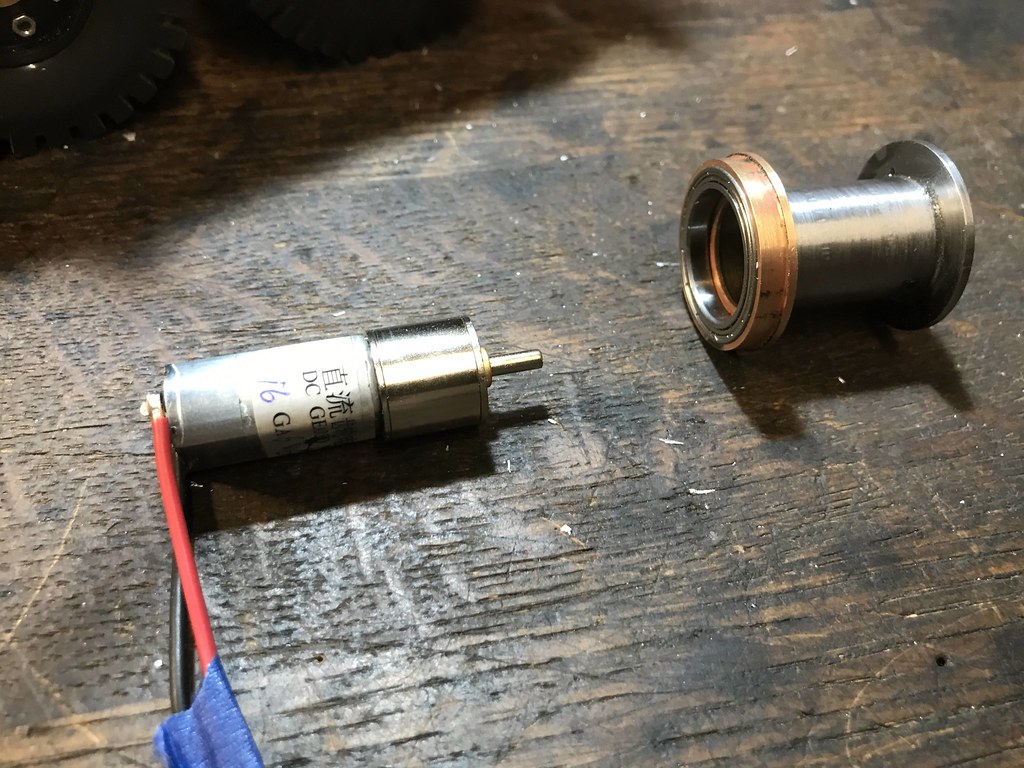 And here with the motor assembled:  I plan to have 4 speed controls in the upper and maybe there is a space for a battery. We will see! Kerst
http://forums.dhsdiecast.com/default.aspx?g=posts&m=1096251
|
|
Rank: Advanced Member
Groups: Member
Joined: 9/7/2005
Posts: 1,154
Location: Copake, NY
|
During the past 2 months I have made good progress. Once all the functions were in place it was time to organize the upper. Luckily there is some space, because the motors take very little space. And I have space for a battery, which will power both the upper and the carrier. I created two different setups for one transmitter/receiver and it seems to work!!!! The receiver will be housed in the counterweight. 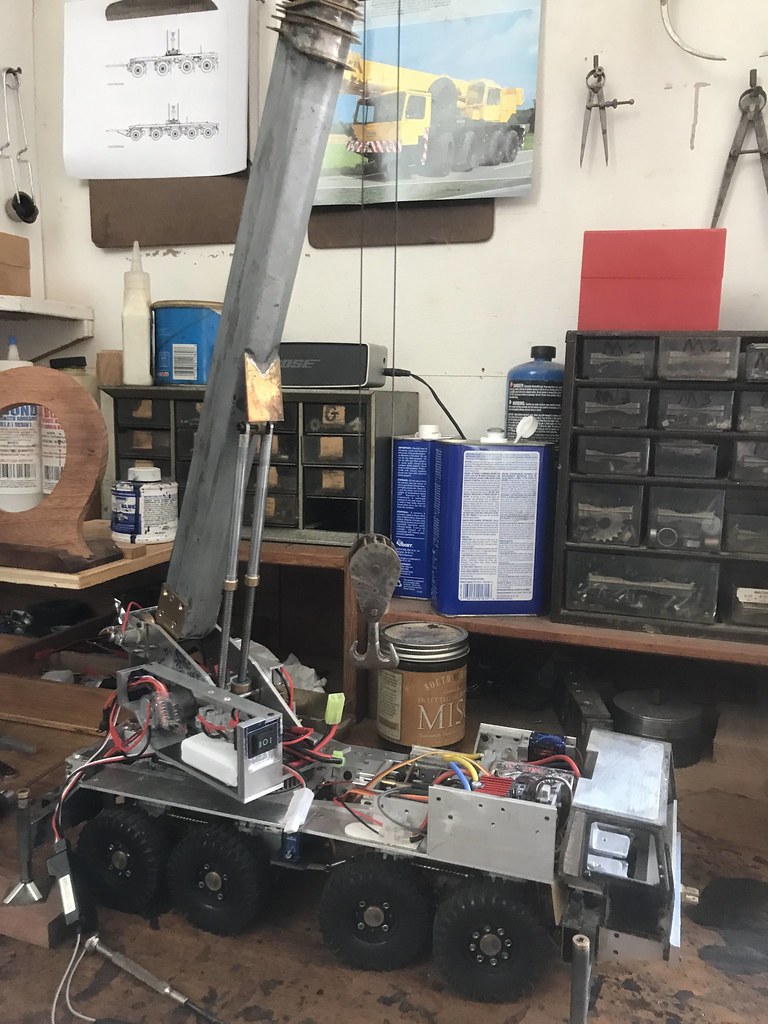 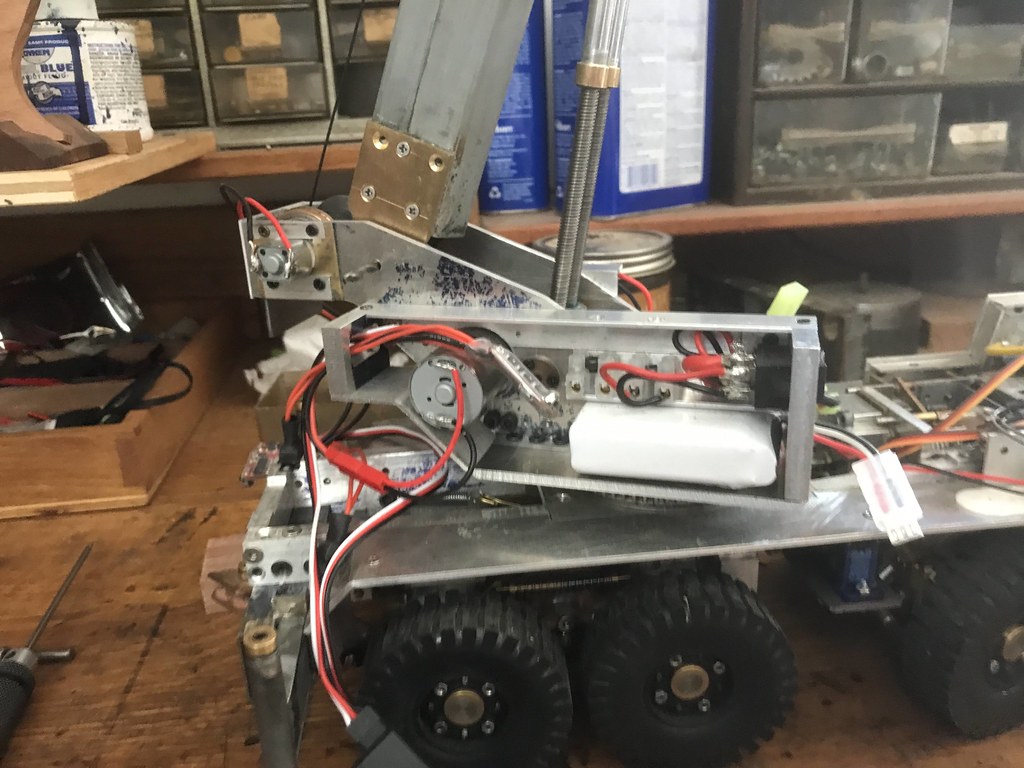  Next is fitting all the RC bits efficiently in the upper and finish the covers, then I will build the cab. Kerst
http://forums.dhsdiecast.com/default.aspx?g=posts&m=1096251
|
|
Rank: Advanced Member
Groups: Member
Joined: 9/7/2005
Posts: 1,154
Location: Copake, NY
|
I made some progress with the crane cab. It is more complicated than I had anticipated, with lots of angles and a sliding door.  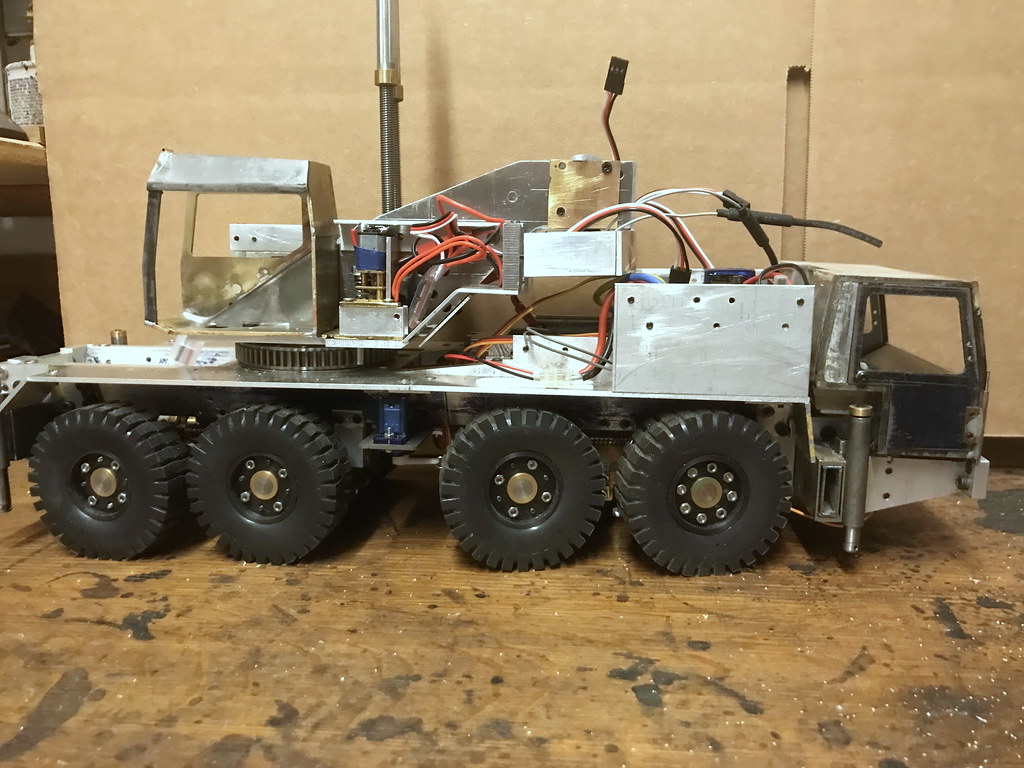 Kerst
http://forums.dhsdiecast.com/default.aspx?g=posts&m=1096251
|
|
Rank: Advanced Member
Groups: Member
Joined: 1/11/2007
Posts: 9,070
Location: Lincolnshire
|
Great progress again!
Paul R
|
|

Rank: Advanced Member
Groups: Member
Joined: 6/21/2012
Posts: 573
Location: N. Cal
|
Looking good! Keep up the good work.
Facebook: NorCalDiecastCustomsInstagram: NorCalDiecastCustomsClifton
|
|

Rank: Advanced Member
Groups: Member
Joined: 1/28/2005
Posts: 197
Location: Vancouver, WA
|
Amazing!
|
|
Rank: Advanced Member
Groups: Member
Joined: 9/7/2005
Posts: 1,154
Location: Copake, NY
|
I entered the last phase of this built. A few weeks ago I took the whole thing apart and started fixing lots of details of the carrier, then priming and painting it. Now it is time to put it all together again. I trying to put all the cables in their right place, which is quite a challenge. Once the carrier is fully done I will do the same with the upper. 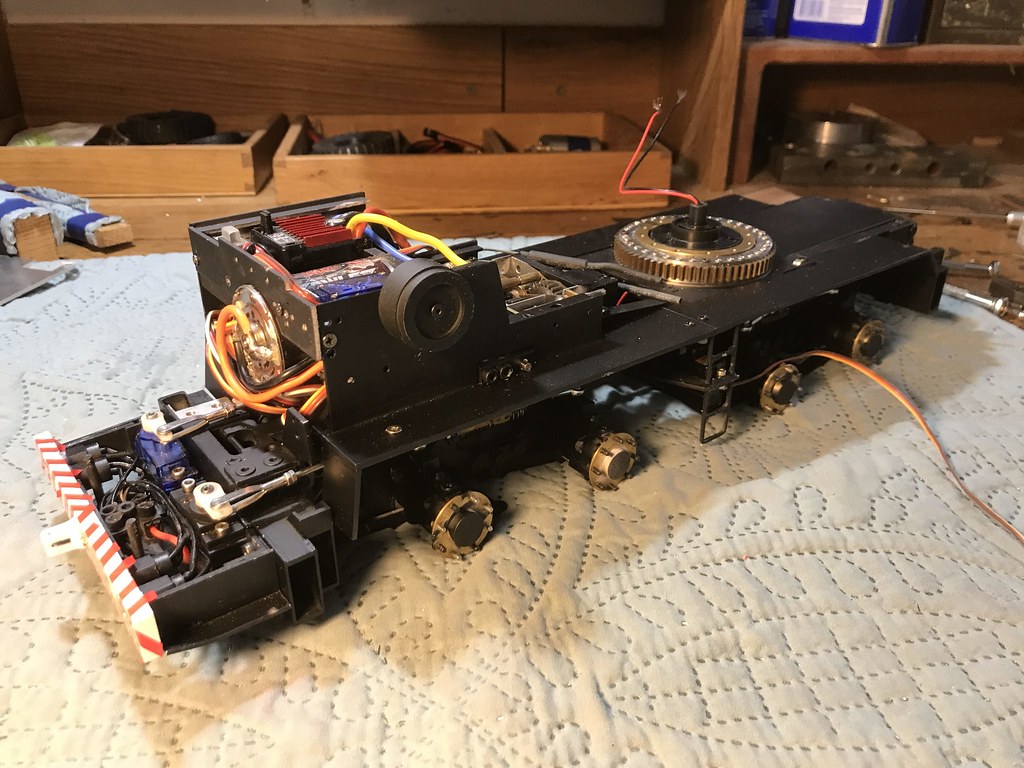  Kerst
http://forums.dhsdiecast.com/default.aspx?g=posts&m=1096251
|
|
Rank: Advanced Member
Groups: Member
Joined: 9/7/2005
Posts: 1,154
Location: Copake, NY
|
It's quite exciting to put it all together again. I took pictures before I took it apart, because I need them to assemble the crane again. Now it is like a kit. Progress is good, but there are still a lot of loose wires and some details to finish. When it is all together I will test it and then i still need to make a hook block and the jib.   Kerst
http://forums.dhsdiecast.com/default.aspx?g=posts&m=1096251
|
|

Rank: Advanced Member
Groups: Member
Joined: 10/4/2005
Posts: 990
Location: england
|
That does look really good. 
|
|
Rank: Advanced Member
Groups: Member
Joined: 9/7/2005
Posts: 1,154
Location: Copake, NY
|
Although I am still working on the details and the painting, I also started testing today. I am very pleased that the telescoping works well and the boom hoist functions better than expected. I don't seem to get the winch to work. Probably an issue with the speed control. The swing needs a bit adjusting, but that is easy. So far so good! 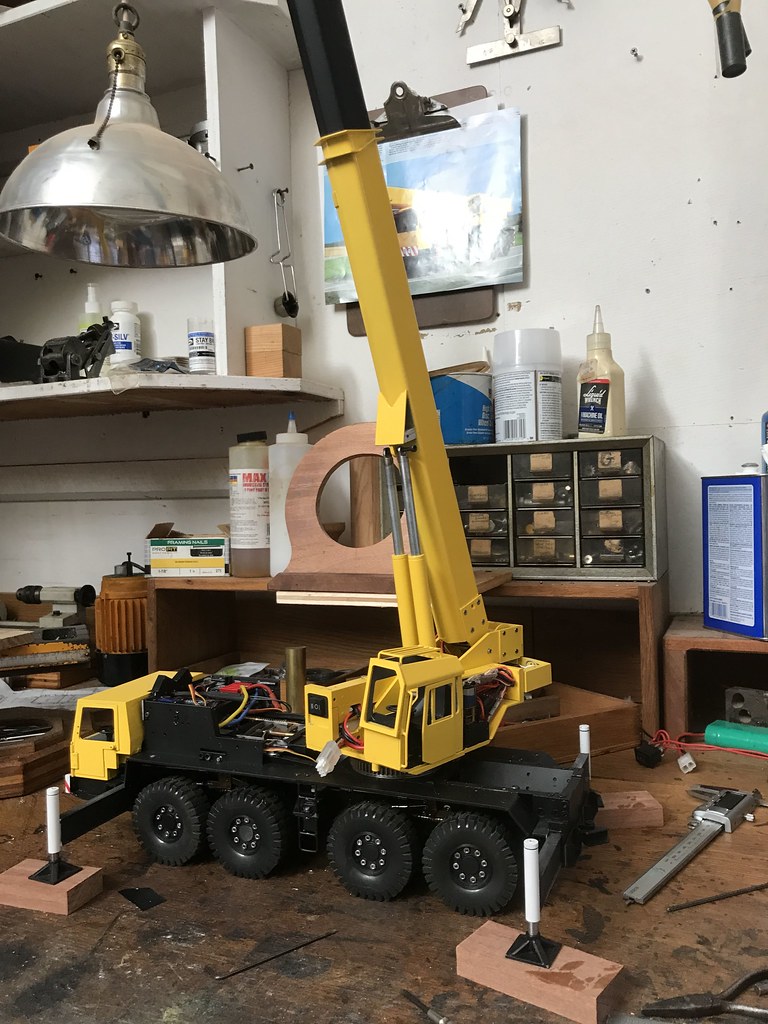 No problem lowering the full length of the boom over the side.  Kerst
http://forums.dhsdiecast.com/default.aspx?g=posts&m=1096251
|
|

Rank: Advanced Member
Groups: Member
Joined: 8/19/2013
Posts: 756
|
Brilliant!
|
|
|
Guest |