|
|

Rank: Advanced Member
Groups: Member
Joined: 2/16/2009
Posts: 903
Location: Peace Dale, R.I.
|
I've been at it for the past week modifying the gantry so that it will NEVER foul the ropes again. I had every thing assembled and was raising the boom when I found out that the boom luffing drums have no holding power what so ever!! The rope suddenly jumped backwards on the drums taking all of the tension off the sheaves causing a massive tangle that I had spent the better part of three hours re-rigging the night before. It was a nightmare again. So, I decided that this would not happen again. After 25 hours of work I now think the problem is solved. Here is what I did: The first thing to fix was the luffing drums. These did not need bolts, just some 0.040" plastic clutches to keep friction on them. They work surprisingly well...nice and tight. 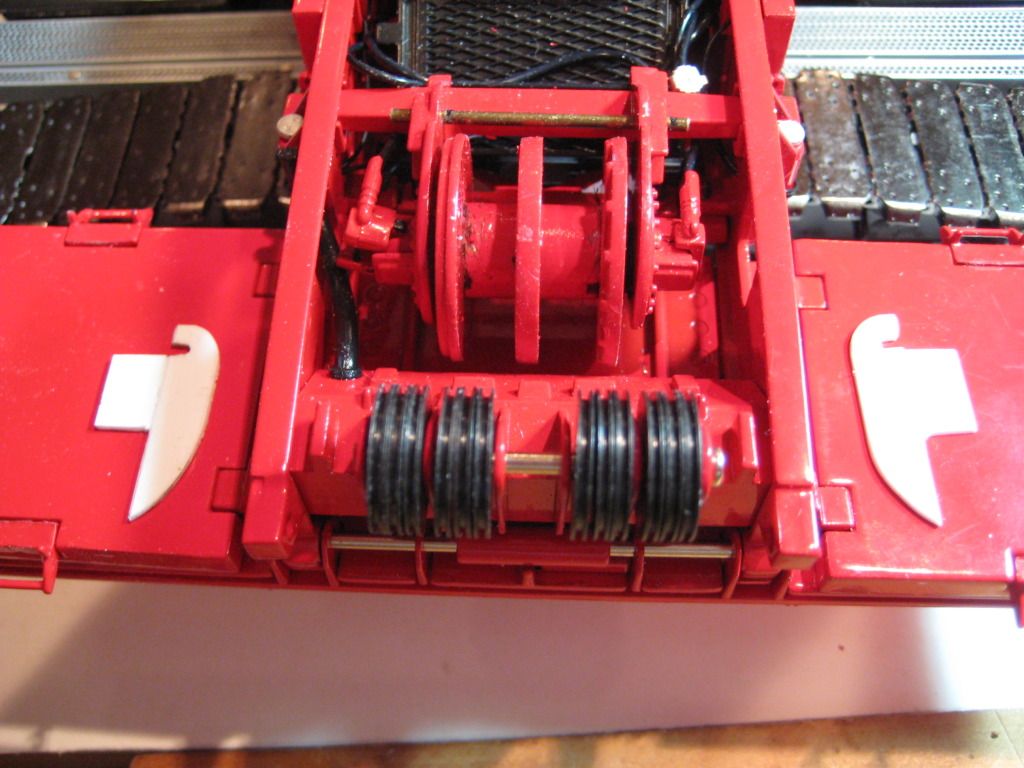  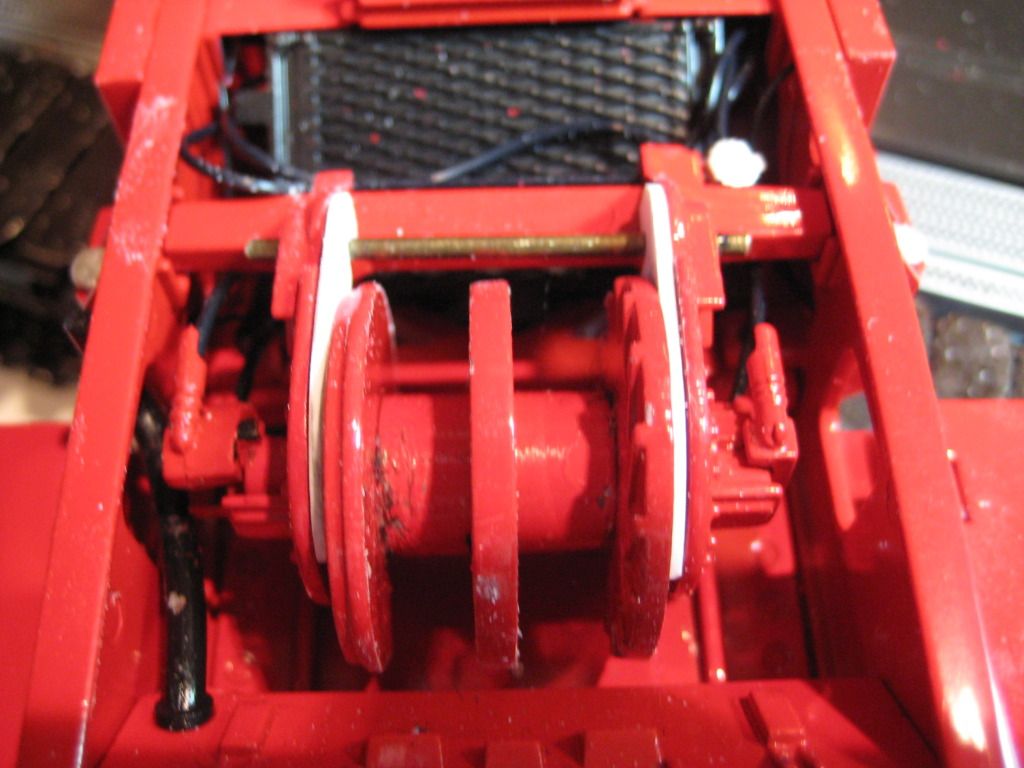 Next was the sheave problem on the gantry: 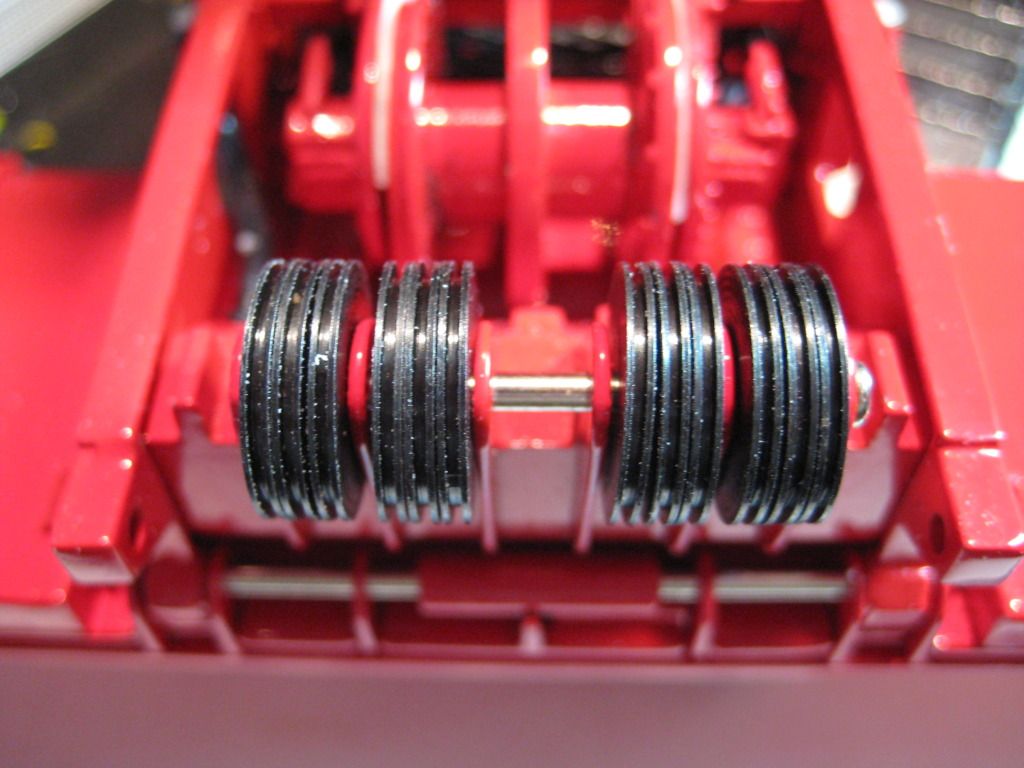 The sheaves are made from steel, not brass. They were not very well made. The sides were very roughly machined... probably from using dull tooling. They had to be sanded down to accommodate the new separators, Here was the first design I made. 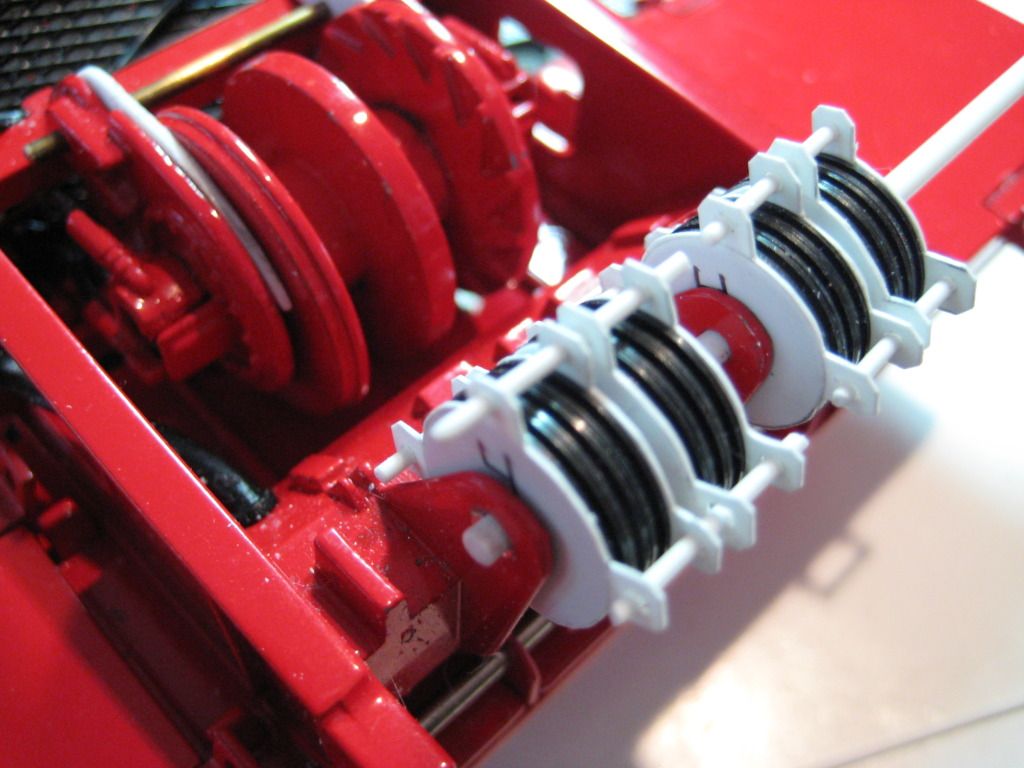 I didn't like the way they looked out of scale so, I made another set for the lower sheaves and, a set for the moving mast. 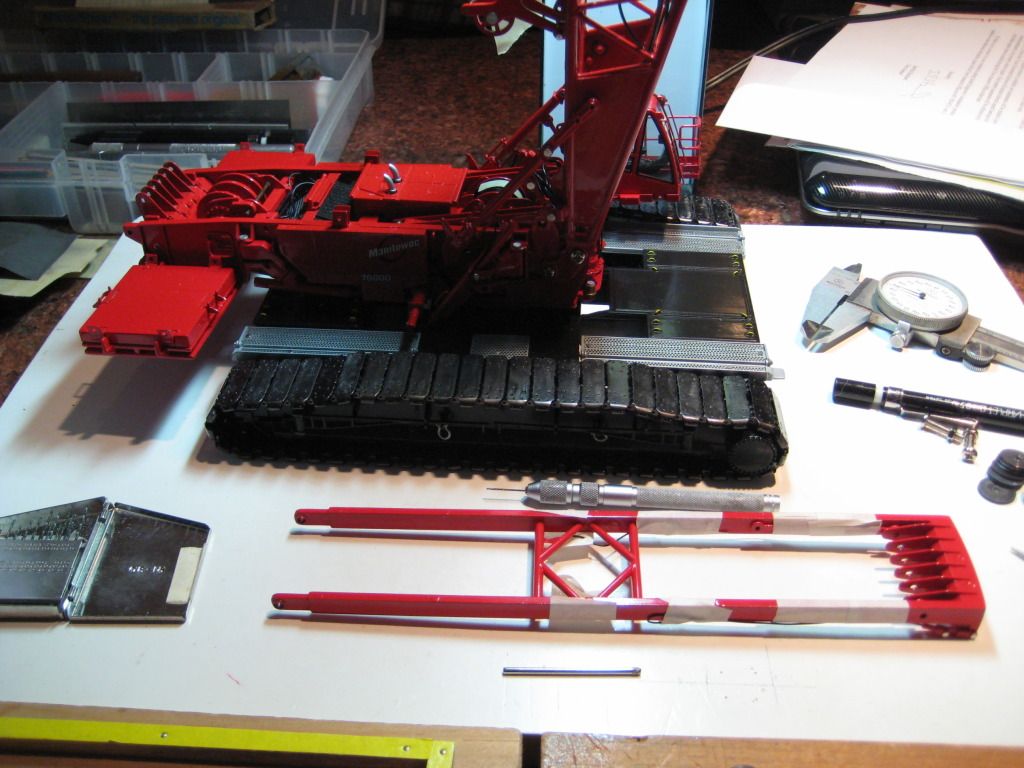 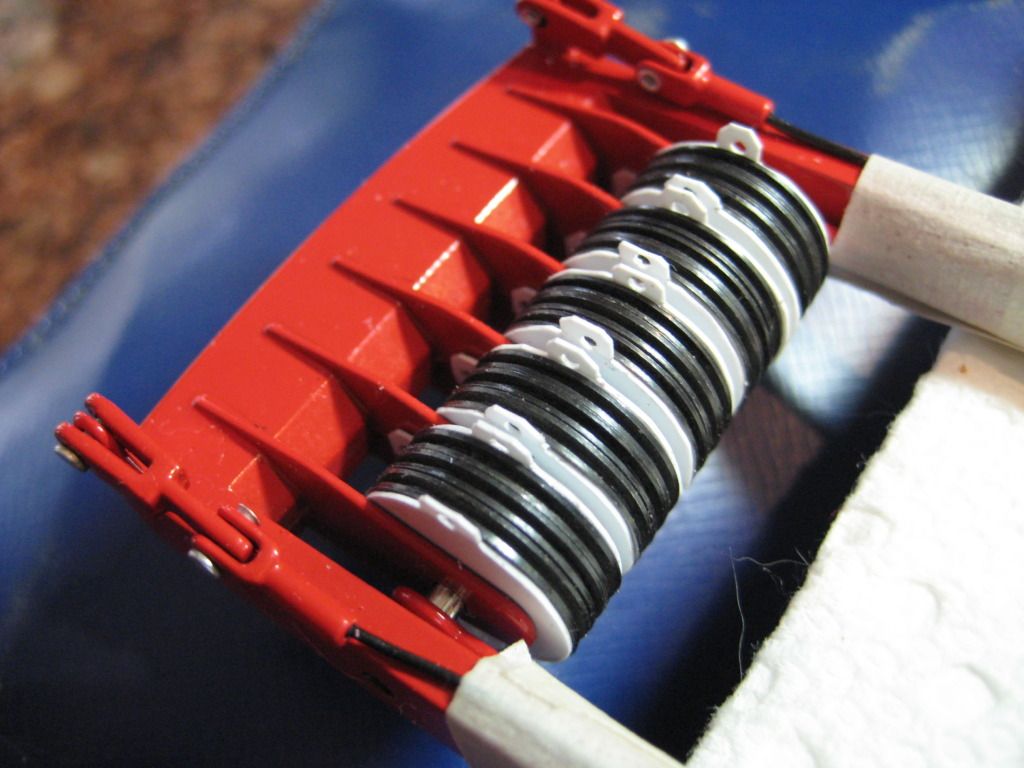 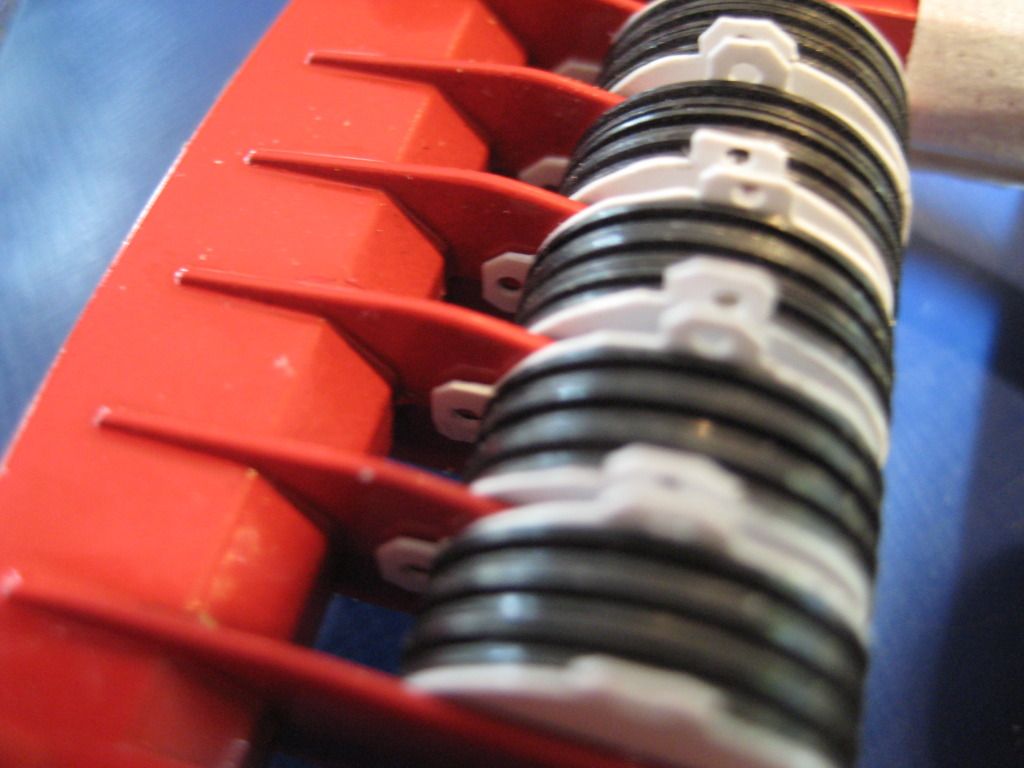 Here are the finished pieces. 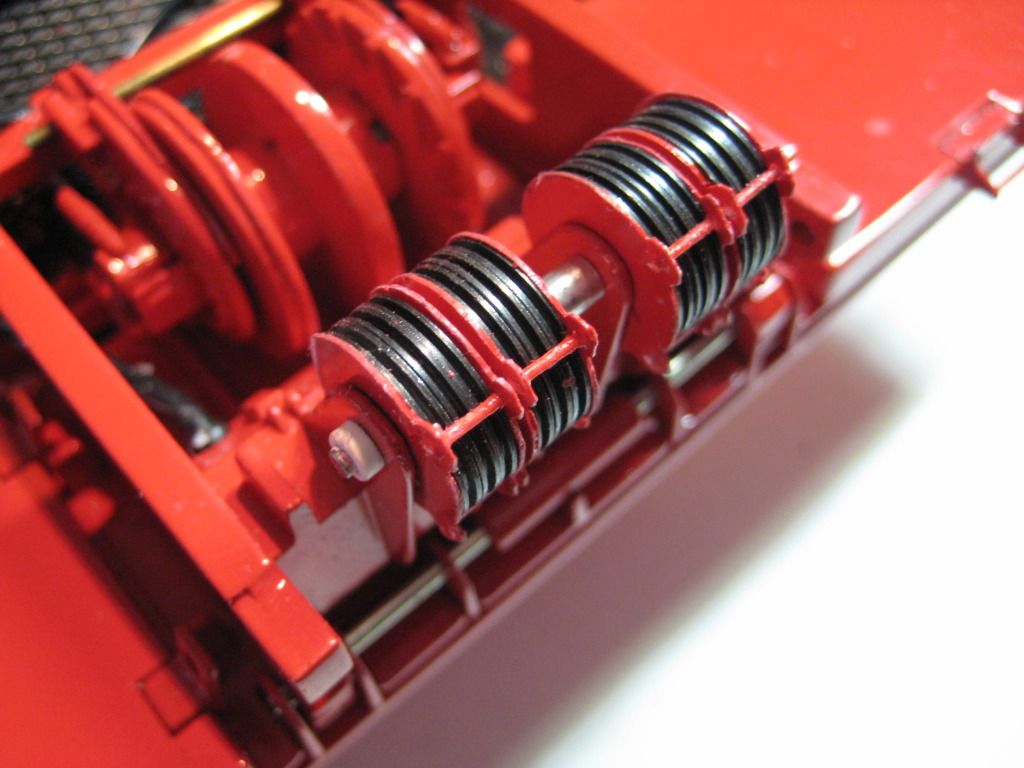 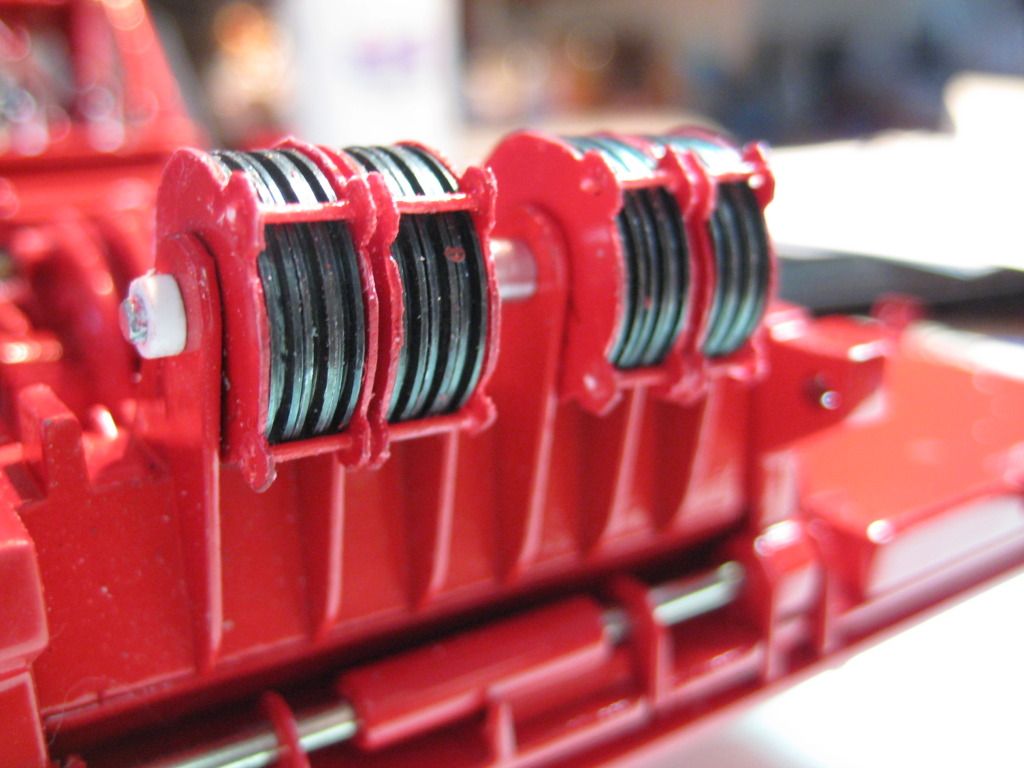 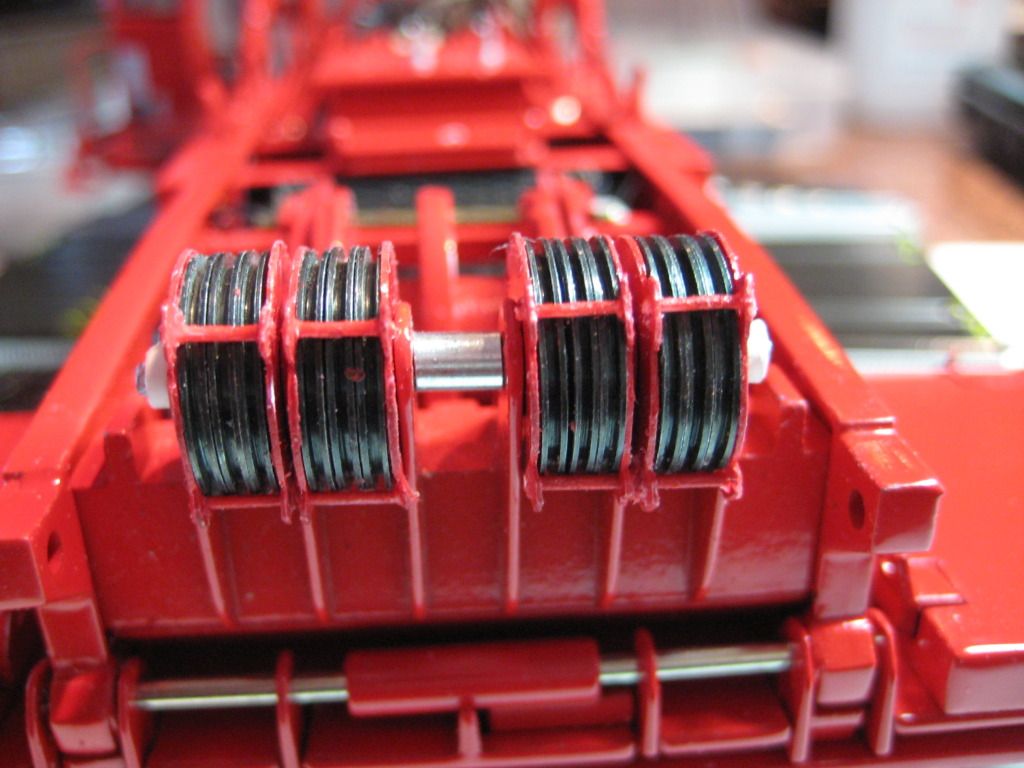 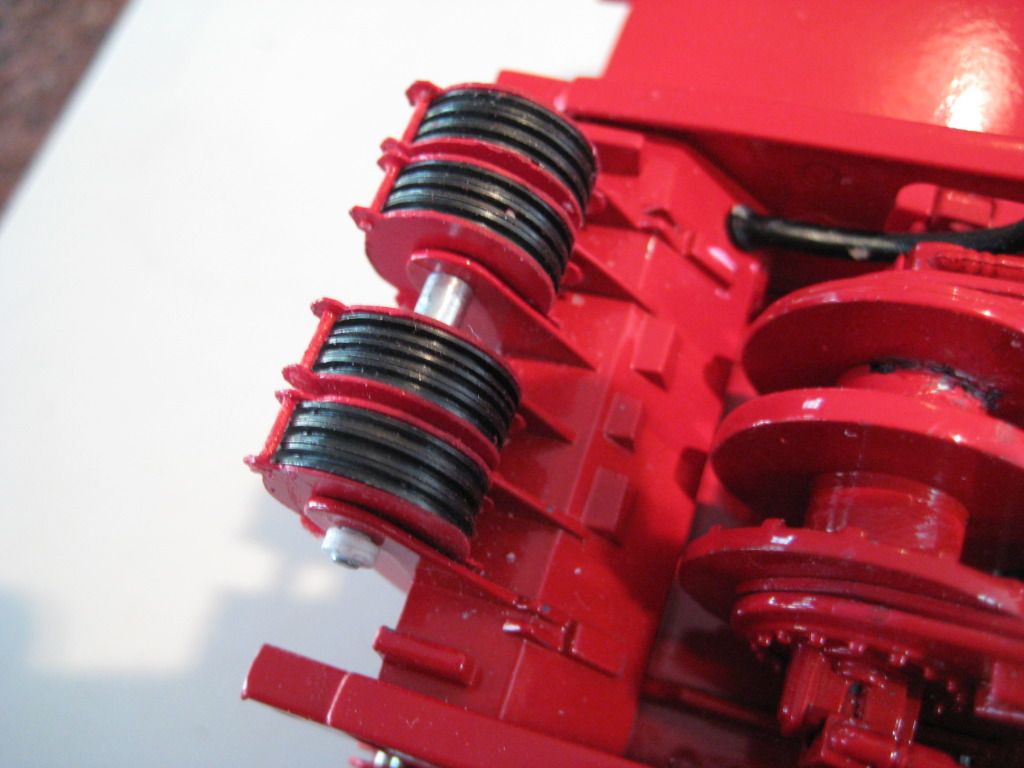 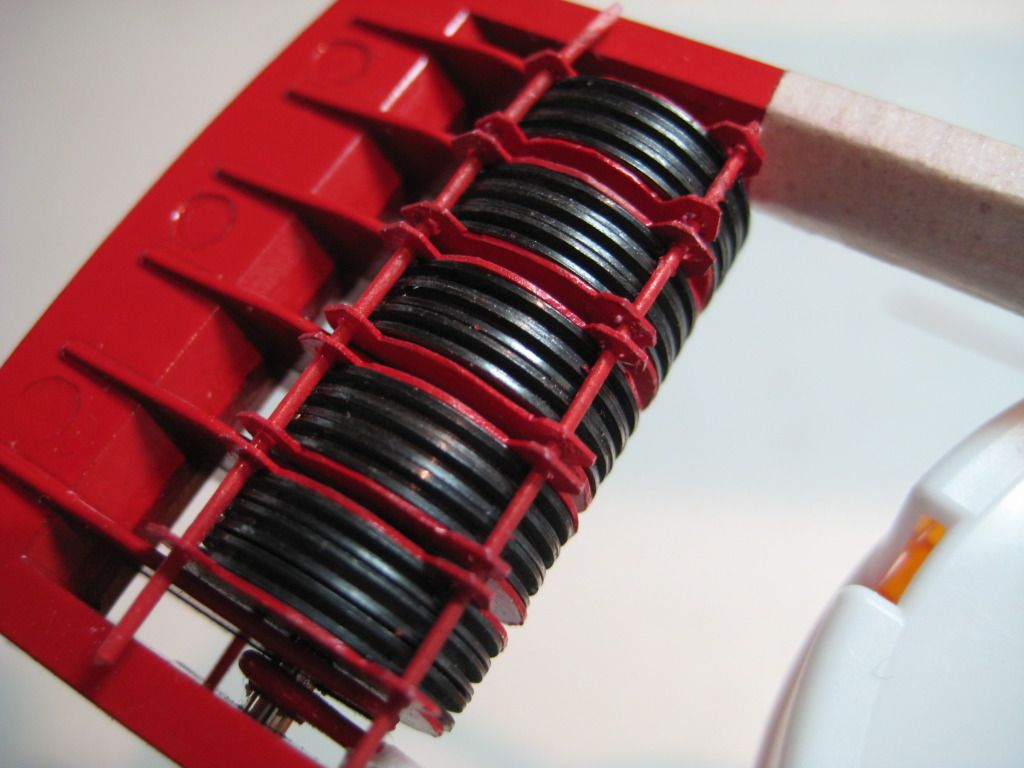 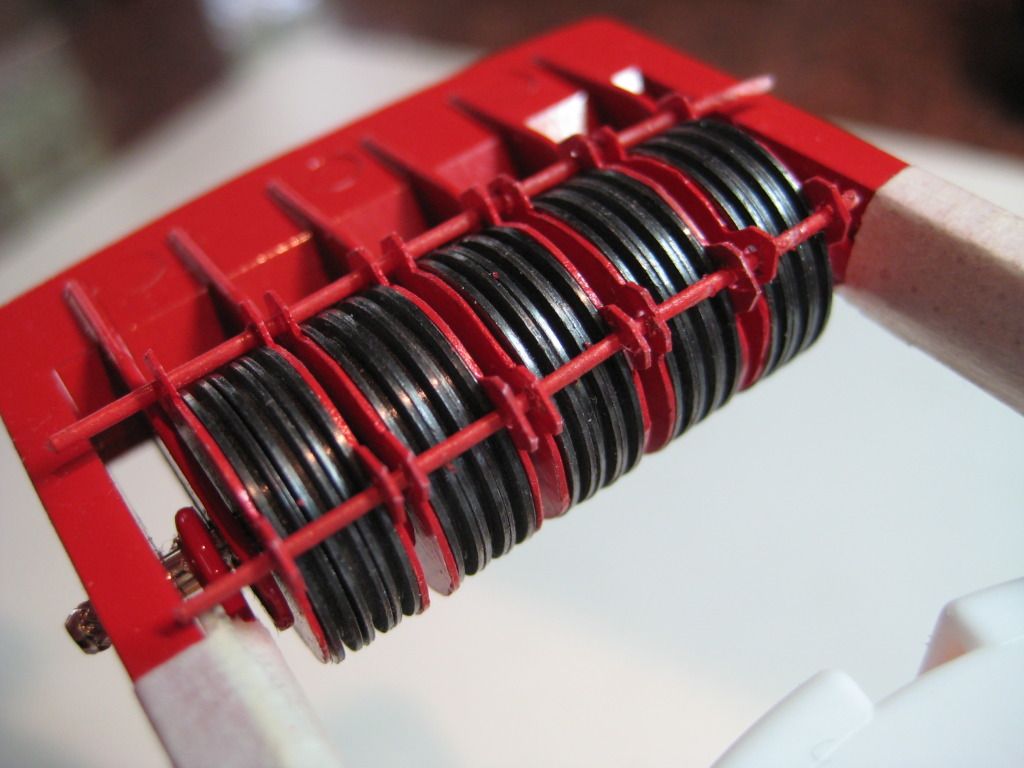 Now I just have to re-rig the gantry and raise the boom. TM
__________________________________________________________________ Tom It's pretty sad when the only modeling tool you own is a box cutter. If the only tool you have is a hammer, you start to see every problem as a nail. Abraham Maslow
|
|

Rank: Advanced Member
Groups: Member
Joined: 9/22/2007
Posts: 5,860
Location: Louisville
|
very nice! i will have to try your braking system on a few drums i dont know if anyone else has this problem, but one of the sheaves on the lower set, for the gantry, the groove for the string is not machined enough, was just wondering if anyone else had this issue? its the 5th sheave from the bottom 
Brandon my youtube channelMy Facebook Page
|
|

Rank: Advanced Member
Groups: Member
Joined: 1/11/2007
Posts: 9,079
Location: Lincolnshire
|
I do really like your braking solution. Apart from the twisted booms on some of these models, the free rolling drums were the only other major flaw. With that fixed, it makes it a nice model again! When will you start mass production of these parts???  Paul R
|
|
Rank: Advanced Member
Groups: Member
Joined: 5/27/2010
Posts: 1,905
|
If I was a crane guy,I'd understand what you are doing,sadly,no clue. Whatever it is, looks great as always.
“A tiger doesn't lose sleep over the opinion of sheep.” ― Shahir Zag
" An educated mind learns from his mistakes and corrects them. A dolt, on the other hand, lashes out and continues showing his ignorance."
-Unknown
“Two possibilities exist: either we are alone in the Universe or we are not. Both are equally terrifying.”― Arthur C. Clarke
"Anti-social behavior is a trait of intelligence in a world full of conformists" - Nikola Tesla
" If you think it's expensive to hire a professional to do the job, wait until you hire an amateur ". Paul Neal "Red" Adair {Wild Well Firefighter for those who live under rocks}
|
|

Rank: Advanced Member
Groups: Member
Joined: 5/18/2008
Posts: 515
Location: Richfield, Oh (Cleveland)
|
Great job on the sheave rope guards and friction braking addition to the drums RI CRANEMAN. keeping the rope in the sheaves is a common problem with many of these models. Your addition looks like a factory installation and will certainly curtail the aggravation many of us experience with the reeving of our models.
|
|

Rank: Advanced Member
Groups: Member
Joined: 3/9/2012
Posts: 246
Location: Portsmouth, NH
|
Cranedude, I had the same problem on mine, both from bad molding and from the superglue they used to deadend a rope on the outside mast sheaves. I actually just took a sharp steak knife to mine (serrated) and was able to cut them out enough. I would have used an x-acto micro saw blade, but many of my tools aren't moved in yet. Good thing my wife didn't catch me... The material isn't high quality and didn't put up much of a fight.
Awesome work, RICRANEMAN! Making me want to go after mine for the same issue. My cardboard looks a bit hokey.
The fundamental aim....is to do everything that is attempted in a first-class way."
-Pierre S. Dupont
|
|

Rank: Advanced Member
Groups: Member
Joined: 6/5/2007
Posts: 2,774
Location: Sarasota, Florida, USA
|
Really awesome fixes there RI!!!! As was said they look factory made, might be a solution to talk to our fearless leader about and maybe send him some design pictures and it could become a standard feature on those cranes!!! I am always tweaking my stuff for things that don't look/work right!! I've been modifying my John Deere Highspeed Dozer so that the tracks function separately (taking out the thru axle) so that it works better while turning as one track should rotate slower than the other. Keep up the good modifications so the rest of us can get some good ideas for stuff too!!!  Might work for my HS855 in a couple spots
Dain I'm a kid at heart, so I will play with any model construction vehicle from 1:87 scale to 1:1 scale!!!! Age is a state of time NOT a state of mind!!
|
|

Rank: Advanced Member
Groups: Member
, Moderator
Joined: 1/15/2007
Posts: 4,089
|
That is super detail work. And I really like you sharing the step by step process.
Bob Bobs CranesCome Over To The Lift Side . . . . . . . We Have Cookies!!!!
|
|

Rank: Advanced Member
Groups: Member
Joined: 1/12/2012
Posts: 164
Location: Fayetteville, NC
|
Tom,
You again have done a wonderful job in solving a common issue. What thickness did you use for the sheave guards? Do they make replacement sheaves in brass? Or is the thickness the issue driving you to file down the existing sheaves?
Thanks
|
|
Rank: Advanced Member
Groups: Member
Joined: 2/16/2009
Posts: 903
Location: Peace Dale, R.I.
|
Ed, the sheave guards are made from 0.010" plastic with 0.025" plastic rod connectors. Once you have pulled the rivet that holds the sheaves, you can measure the space where the sheaves were. Then, measure three sheaves together. The difference between them is the "gap" that the guards have to fit into. You need at least 0.020" gap but you can put in another 0.010" or so so the sheaves will run freely. I used 100 grit sandpaper to smooth the sides of the sheaves followed by finish sanding with 400 grit paper. The idea behind this system is to keep the sheaves together so the rope cannot get down in between them.
__________________________________________________________________
Tom
It's pretty sad when the only modeling tool you own is a box cutter.
If the only tool you have is a hammer, you start to see every problem as a nail. Abraham Maslow
|
|

Rank: Advanced Member
Groups: Member
Joined: 12/25/2007
Posts: 1,358
Location: Kodiak Ak.
|
That looks right out of the factory Tom. Another great fix. Thanks for sharing all the little projects you do.
|
|
Rank: Advanced Member
Groups: Member
Joined: 1/12/2012
Posts: 164
Location: Fayetteville, NC
|
Tom,
Thanks for the information. It looks like you have cut a relief tab inside the spacer going down towards the center. What is its purpose and design? Or is it just markings? Thanks again.
|
|
|
Guest |