|
|

Rank: Advanced Member
Groups: Member
Joined: 10/4/2005
Posts: 983
Location: england
|
Lookin,really,REALLY good.Cannot wait to see,it finished.Well done. 
|
|
Rank: Advanced Member
Groups: Member
Joined: 5/11/2009
Posts: 570
|
Thanks modelmaniac - much appreciated! So I've started work on the bucket and am making good progress despite the frustrations inherent in this process (and I've done it many, many times). I've drawn a 1:1 pic of the bucket in 1/24 scale and have traced out the main shapes onto sheet styrene via a template which I'll keep for future buckets. The main part of the bucket will be made separate from the top part where the ears attach, and I've started to wrap the bar at the top in 0.5mm styrene sheet. It needs a lot of weight to stop it from springing free, so I'm using around 1kg of vintage kitchen weights to keep it under pressure while the cement sets. I took way too long to decide on the width of the bucket and settled on a HD rock bucket with 2600mm cutting width, which at my chosen scale is around 11cm / a little over 4 inches. As I love building buckets I want to make it a real eye-catcher so I'm going to put some nice wear plate detail on it. Teeth... five or six, whichever looks best, and it'll be spade nosed. digggerr, to answer your question, I've already put probably over a hundred hours in thus far and I don't see any point keeping track as this project will most likely be measured in months and weeks when I'm done! Regarding expense, so far the outlay in materials and tools hasn't been significant, maybe around £100 at the very most, which is about $130 US, and I think I have enough styrene to complete the build. Paint won't be particularly expensive either... the biggest expense is time, but I can buy time with the precious currency of sleep as long as I don't overdo it haha. More to come shortly.  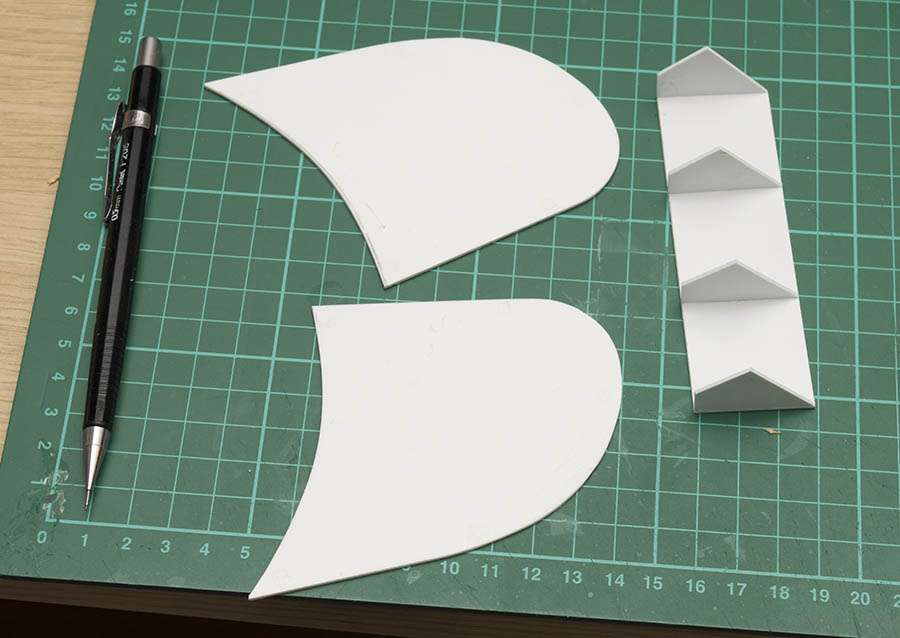 
|
|

Rank: Advanced Member
Groups: Member
Joined: 6/4/2006
Posts: 7,744
Location: arlington, Tx
|
Looking good buddy, you ever need styrene I buy it in 4x8ft sheets Jason
Nikl Scale Models nikl scale models shapeways store
|
|
Rank: Advanced Member
Groups: Member
Joined: 5/11/2009
Posts: 570
|
Thanks Jason! That's a lot of styrene...sheesh! Today I finished putting the ears on the bucket and test fitting the bucket to the stick. I'm very pleased with the result as the holes have lined up really nicely and it's all snug, and the cylinder is very strong so will hold any position. Range of motion is excellent as well... all I have to do now is detail the bucket with teeth etc. and it's pretty much done. I'll likely start work on the boom now and I expect it to be a pretty time-consuming part of the process because a lot of measurements have to be absolutely spot on to ensure that the boom will fit correctly with the connecting points on the machine. Pics:  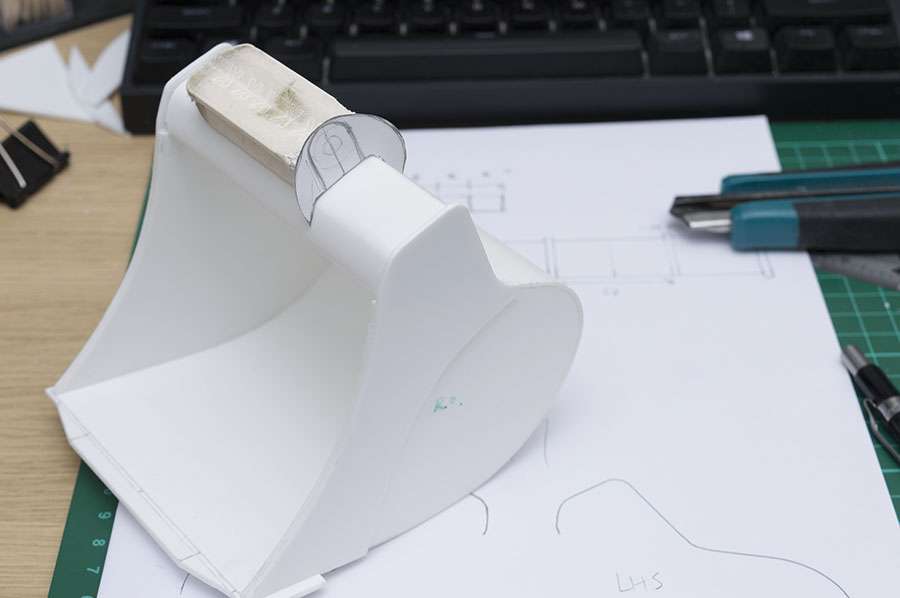 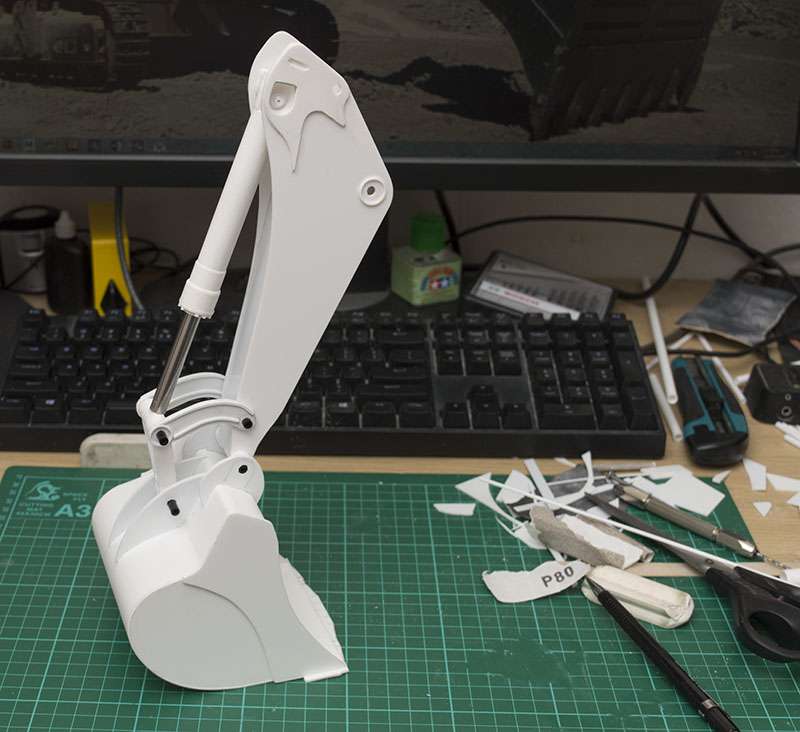
|
|

Rank: Advanced Member
Groups: Member
Joined: 2/22/2008
Posts: 213
Location: Columbia, MD
|
Davie82,
Let me tell you, I am impressed. I have followed your project from the beginning, and your Liebherr 984 is simply outstanding!! Whenever your post has come up with updates, I get excited to see the progress you are making. Please continue sharing your progress; I am sure every forum member also eagerly awaits the latest update.
There truly are really talented folks here.
|
|
Rank: Advanced Member
Groups: Member
Joined: 11/15/2003
Posts: 1,144
Location: North America
|
Davie82 wrote:digggerr, to answer your question, I've already put probably over a hundred hours in thus far and I don't see any point keeping track as this project will most likely be measured in months and weeks when I'm done! Regarding expense, so far the outlay in materials and tools hasn't been significant, maybe around £100 at the very most, which is about $130 US, and I think I have enough styrene to complete the build. Paint won't be particularly expensive either... the biggest expense is time, but I can buy time with the precious currency of sleep as long as I don't overdo it haha. I do understand your preference to use months instead of hours for a reference as I suspect you have days of some activity, days of no activity and days where you just "burst" with fabrication for an extended period of time? If I may ask; and this may sound crazy, but do you listen to music while you're fabricating? If so; what artists? Keep the photos coming!!!
|
|
Rank: Advanced Member
Groups: Member
Joined: 5/11/2009
Posts: 570
|
mariot - thank you very much. It's great for me to be part of this as well! digggerr - yeah it's variable, depending on what else I have on and how tired I am. I often have music playing but sometimes I'm so deep in concentration it wouldn't matter because I wouldn't notice it. I usually just stick on a random Youtube video and let it run its course, anything from Megadeth to ABBA. Today's update: I've been putting a lot of time into the bucket to get the teeth done and I've decided just to keep going with it until it's finished, because then I can prime it and paint it and get an idea of how to approach the rest of the machine. I'm deliberately building the bucket with some wear, so the teeth are a little stubby and rounded, and I have a good idea of what kind of weathering I want it to have. Once the putty is dry I have a lot of sanding to do and then I can work on details like wear plates, lifting eyes and guards etc. In these pics the putty is still wet/tacky so I'm having to be careful how I handle it... don't want finger prints everywhere! As always it's difficult to show the forms and details when everything is white, but I'm very pleased with how this turned out... definitely worth the work! 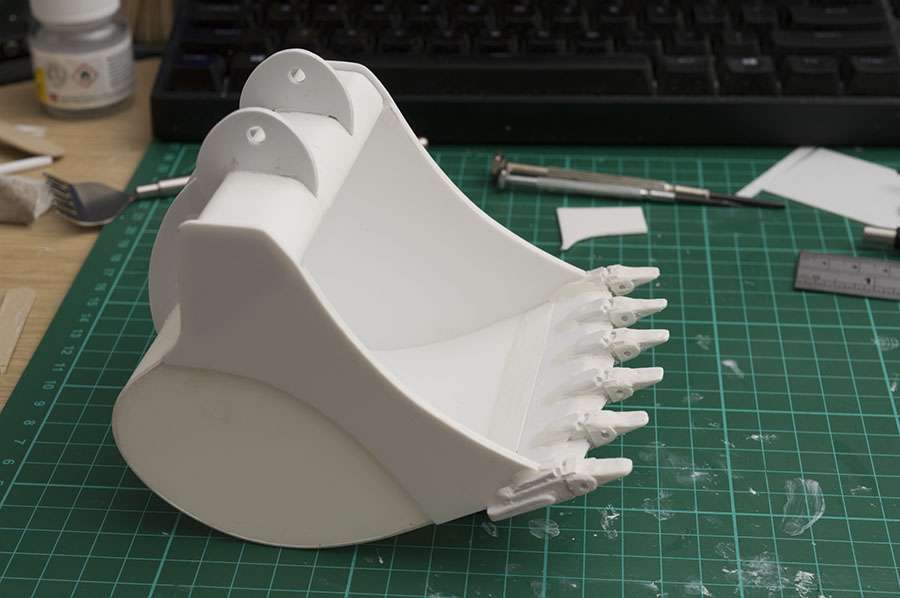 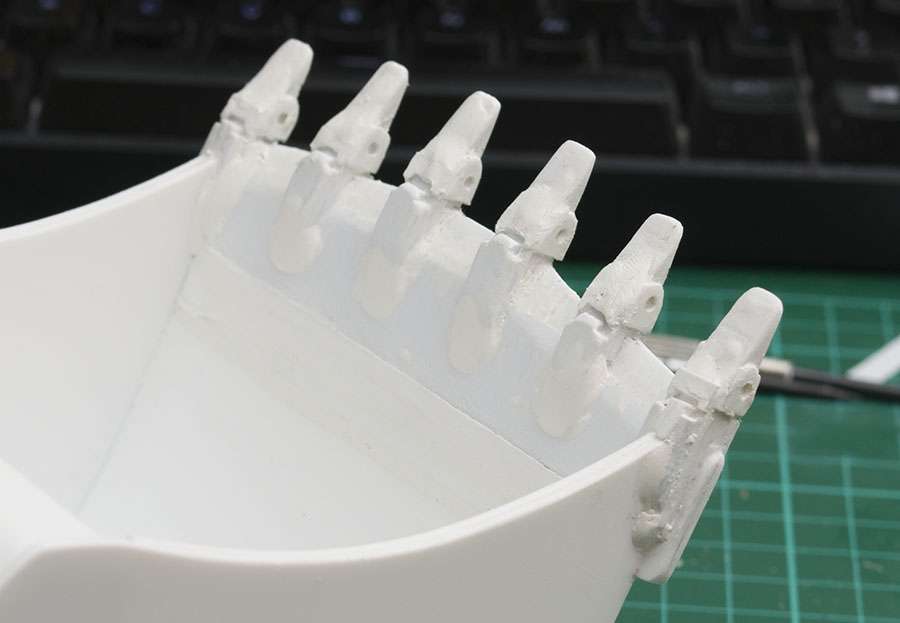
|
|

Rank: Advanced Member
Groups: Member
Joined: 10/7/2005
Posts: 2,495
Location: Shetland
|
Hi Dave, I'd just like to chip in and say I'm really enjoying your project too. Great work and I can't wait to see the finished machine
Scania V8. The best sounding truck in the world.
|
|

Rank: Advanced Member
Groups: Member
Joined: 4/20/2010
Posts: 582
|
Can't wait to see the end result of this Davie, your attention to detail is amazing!
Sam My equipment picture thread
|
|
Rank: Advanced Member
Groups: Member
Joined: 10/31/2011
Posts: 1,079
Location: Springfield, Oregon
|
|
|
Rank: Advanced Member
Groups: Member
Joined: 5/11/2009
Posts: 570
|
Paul, samk706 and HCF - many thanks guys. The support means a lot! Between yesterday and today I did more putty/filling work (on the counterweight too - more on that later) and today I started adding detail to the underside and back of the bucket. I added weld seams which help the bucket to look more sturdy and also add strength to the plastic joins. Just a little bit more to do and I'm ready to think about painting and weathering the bucket. I've ordered 8 cans of Simoniz acrylic primer and will be priming the bucket in red oxide as it's going to have some rust weathering. I'll probably do the same with the undercarriage as I want there to be plenty rust there too, particularly the track pads. I'm planning to prime the rest of the machine grey as it'll help to dull the white topcoat, and I've got some Humbrol "off white" coming tomorrow just to see if the colour will work or if I'll have to mix my own. Pics: 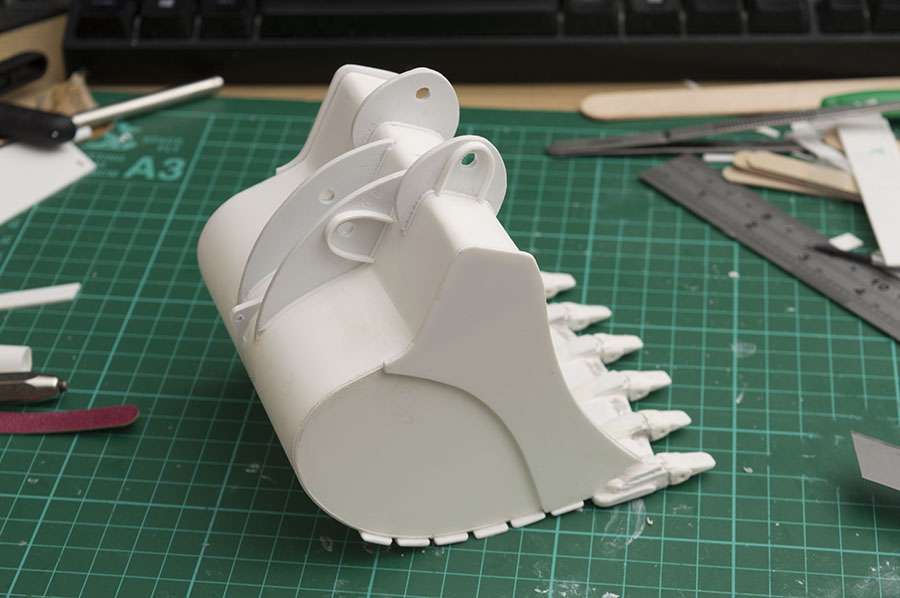 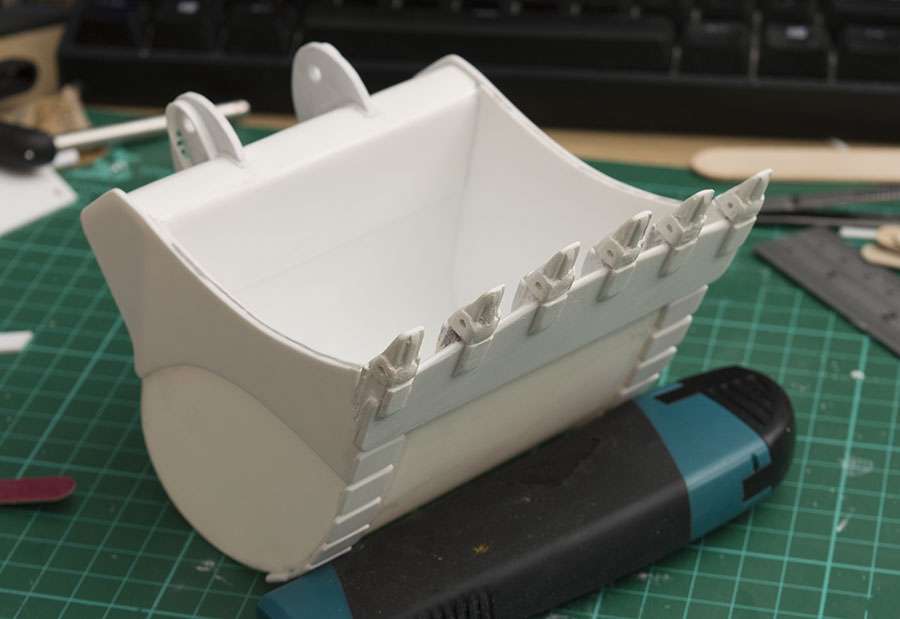
|
|
Rank: Advanced Member
Groups: Member
Joined: 6/4/2006
Posts: 7,744
Location: arlington, Tx
|
Looking good buddy, I like watching it come together
Nikl Scale Models nikl scale models shapeways store
|
|
Rank: Advanced Member
Groups: Member
Joined: 5/11/2009
Posts: 570
|
Thanks Jason.  Almost ready to paint the bucket now - just the final pieces of wear plates to be added and one final sand with fine paper, and I'm good to go with primer. My spray primer arrived this morning so I did a test on a spare piece of styrene. As I mentioned before I'm using red oxide primer for the "contact" parts of the machine, and I'll be adding various colours to create a sort of aged rust effect coupled with lots of scrapes and bashes to the topcoat. For the bucket and the undercarriage, the topcoat will be my approximation of Liebherr gray. I'm really happy with the test and look forward to attempting it on the bucket once the primer is down and dry. I'll be adding more weathering once all the painting is done, but it's really important to me to get a convincing rust look off the bat. Pics:   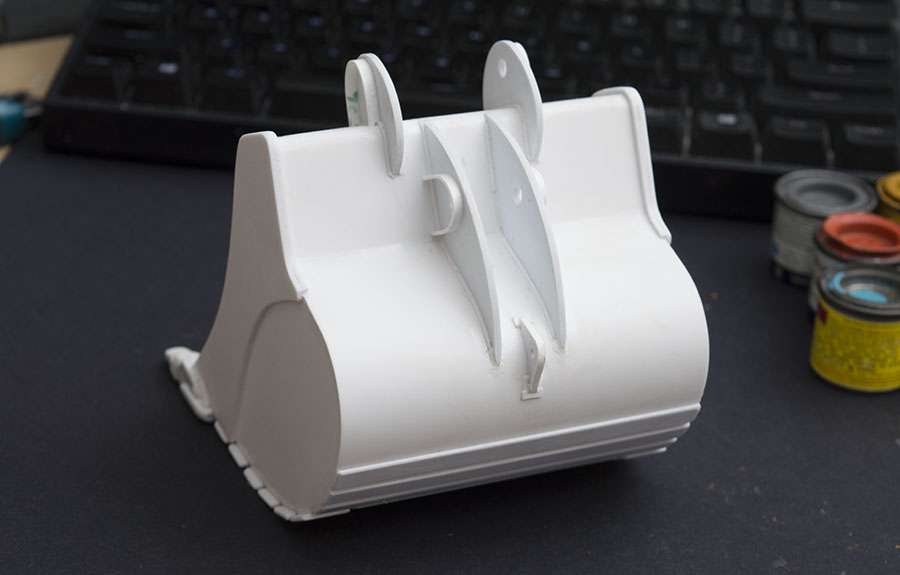
|
|
Rank: Advanced Member
Groups: Member
Joined: 5/11/2009
Posts: 570
|
Here's the bucket primed with around three coats of red oxide. The paint has taken very well and has a fantastic texture which sands very easily if needs be. I've already started the top coat and should be finished pretty soon. After that it'll need some details and refinement to the weathering, and it's done. 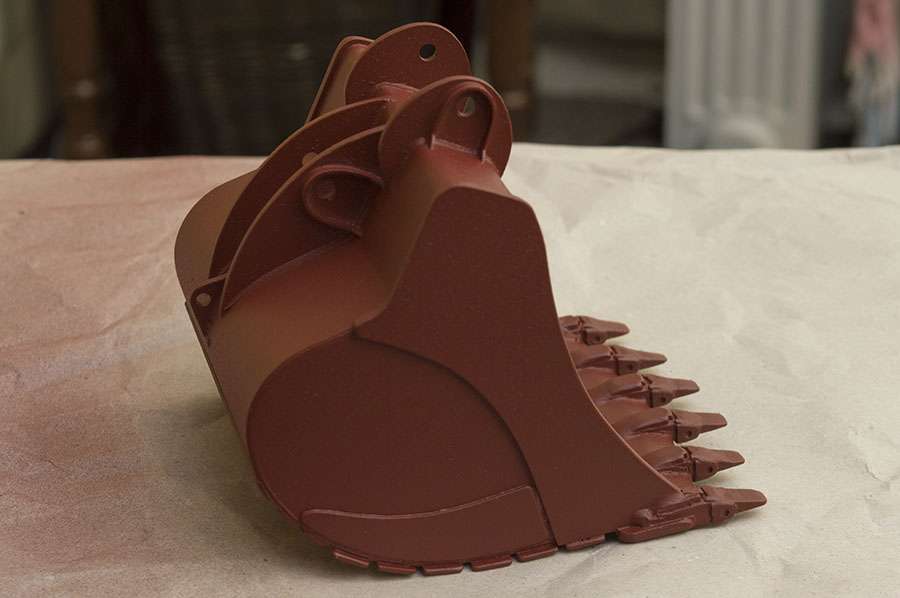
|
|
Rank: Advanced Member
Groups: Member
Joined: 5/11/2009
Posts: 570
|
Here are some pics of current progress. I started the weathering topcoat on the bucket and it has been drying now for almost two days. There's a mixture of matt, satin and gloss paints being used and I'm going to go over all the rust with matt varnish once I finish the painting. I'm also thinking about using some metallic paint to indicate exposed scratches, especially on the teeth and cutting edge. At this stage I'm being very experimental with it, so it's all up in the air. I also started the gooseneck today and it's coming together quite quickly - so much so that I was able to assemble the model for the first time. My next goal is to finish the four cylinders and get them all fitted, then I have a big job of tidying things up, truing the hinges to make sure they are perfectly straight, and thinking about priming and painting the boom. The black rod I'm using for the hinges came from a cheap cat toy that my wife bought, which the kids subsequently damaged. The rod when cut short is really sturdy and around 4.25mm diameter, so it works perfectly with 4.5mm holes. Sometimes the problems just solve themselves! 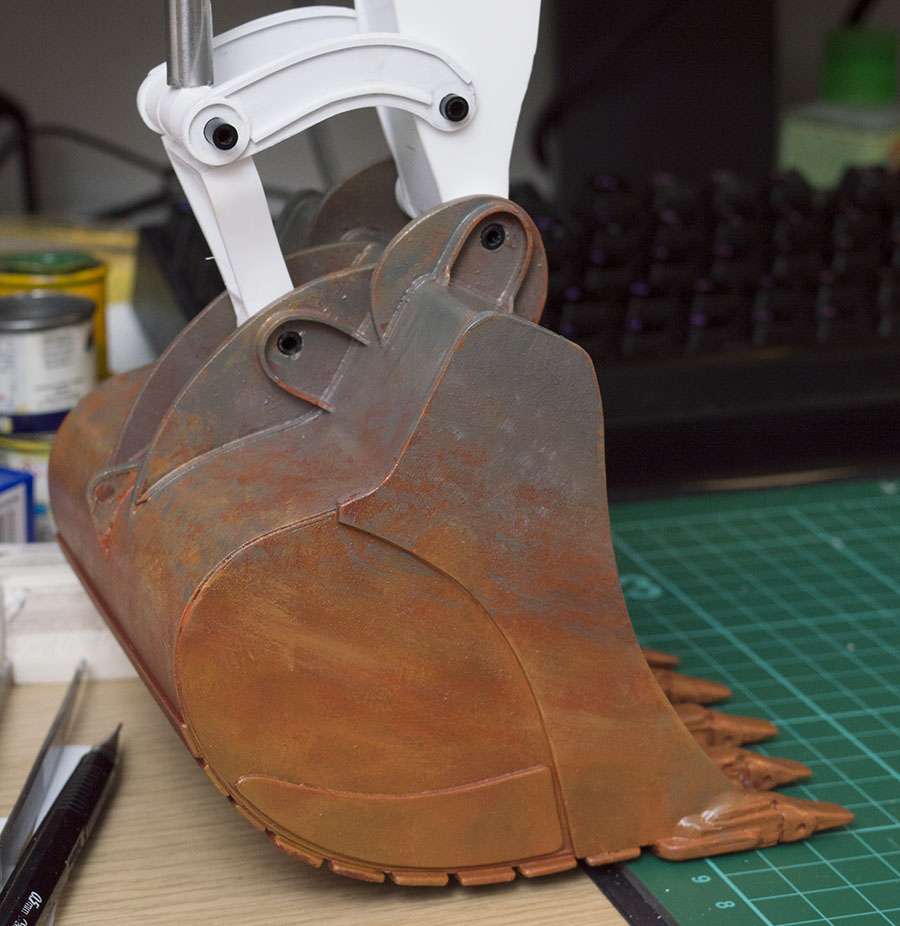 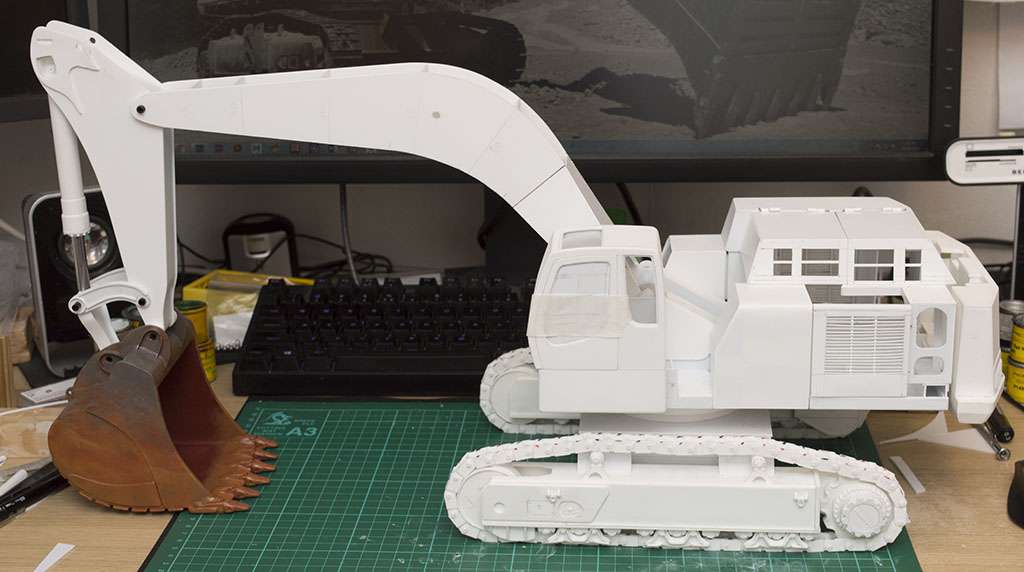 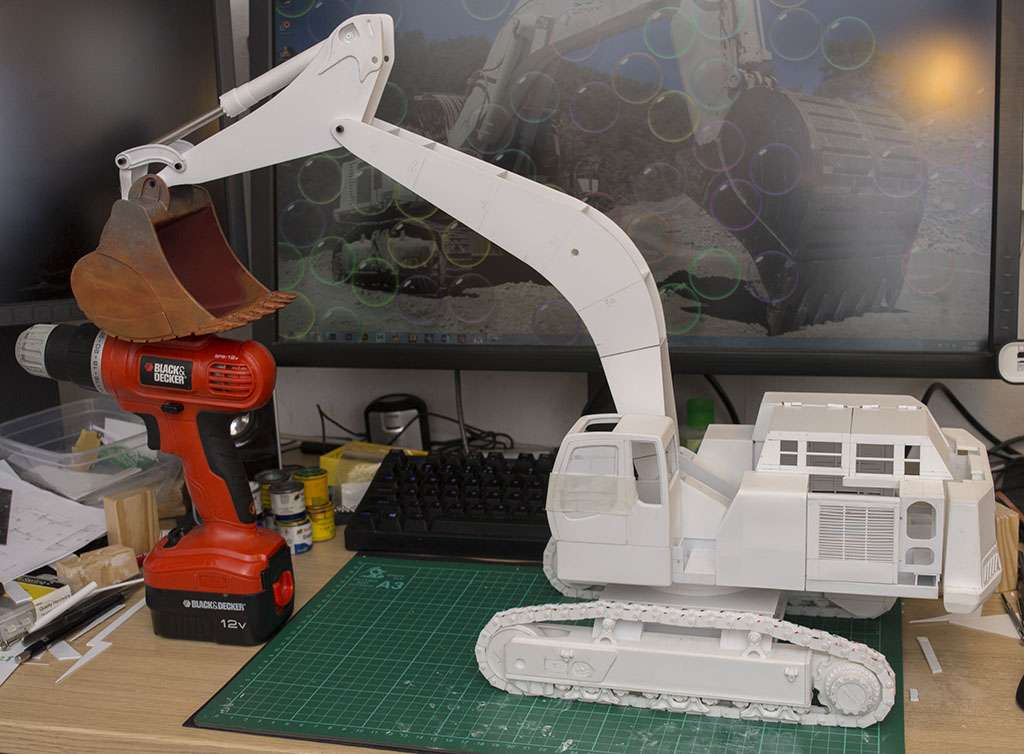
|
|
Rank: Advanced Member
Groups: Member
Joined: 3/15/2006
Posts: 139
Location: WALES
|
Weathering is my favorite part and I have to say that is looking awesome!
|
|
Rank: Advanced Member
Groups: Member
Joined: 10/4/2005
Posts: 983
Location: england
|
Love,the look of that bucket!Coming along,very nicely. You have the same Black and Decker drill,as me!LOL.
|
|
Rank: Advanced Member
Groups: Member
Joined: 11/15/2003
Posts: 1,144
Location: North America
|
Davie82 wrote:digggerr - yeah it's variable, depending on what else I have on and how tired I am. I often have music playing but sometimes I'm so deep in concentration it wouldn't matter because I wouldn't notice it. I usually just stick on a random Youtube video and let it run its course, anything from Megadeth to ABBA. Wow; that's quite the spectrum of music! Since I don't get on here daily; catching up with the bucket construction has been as impressive as the rest of the build. One thing in particular I like are the weld beads on the eyes. Did you do any of this detailing inside the bucket? Extremely realistic! What material did you use for this purpose? Please don't take this out of context; but I'm curious why you didn't apply the same detail to other seams? To see it in one place and not another just kinda struck me. I'm sure it's very tedious work, but it adds so much!
|
|

Rank: Advanced Member
Groups: Member
Joined: 8/19/2013
Posts: 694
|
Incredible! You, Hummer13 and Diego are very talented indeed.
|
|

Rank: Advanced Member
Groups: Member
Joined: 9/12/2012
Posts: 484
Location: San Diego, California
|
Wow, that drill really gives the size some perspective. Killer work so far!
|
|
|
Guest |